Showing posts with label 3d printers. Show all posts

Saturday, August 1, 2026

Breakthrough 3D Printing Dataset Unveiled

Featured Image

Advancements in Additive Manufacturing Through New Dataset

The Oak Ridge National Laboratory (ORNL) has made a significant breakthrough with the release of its most advanced dataset to date. This dataset, developed using the Peregrine software, is designed to monitor and analyze parts created through powder bed additive manufacturing. The dataset is now available for researchers and manufacturers to further enhance their understanding and application of this cutting-edge technology.

The dataset, titled "In situ Visible Light and Thermal Imaging Data from a Laser Powder Bed Fusion Additive Manufacturing Process Co-Registered to X-ray Computed Tomography and Fatigue Data," represents a major step forward in supporting the nation's additive manufacturing industry. As part of a study aimed at establishing strong correlations between manufacturing anomalies, internal defects, and mechanical performance, the Department of Energy's Manufacturing Demonstration Facility has produced this comprehensive resource.

This dataset offers state-of-the-art monitoring data for laser powder bed fusion (L-PBF), a process that uses a laser to melt and fuse metal powder into layers to create metal parts. It includes machine process parameters, sensor data, geometries, and detailed images of the 3D-printing process captured from multiple angles and lighting types. The dataset combines high-resolution visible and near-infrared imaging with X-ray scans of the printed parts, providing an extensive view of the manufacturing process.

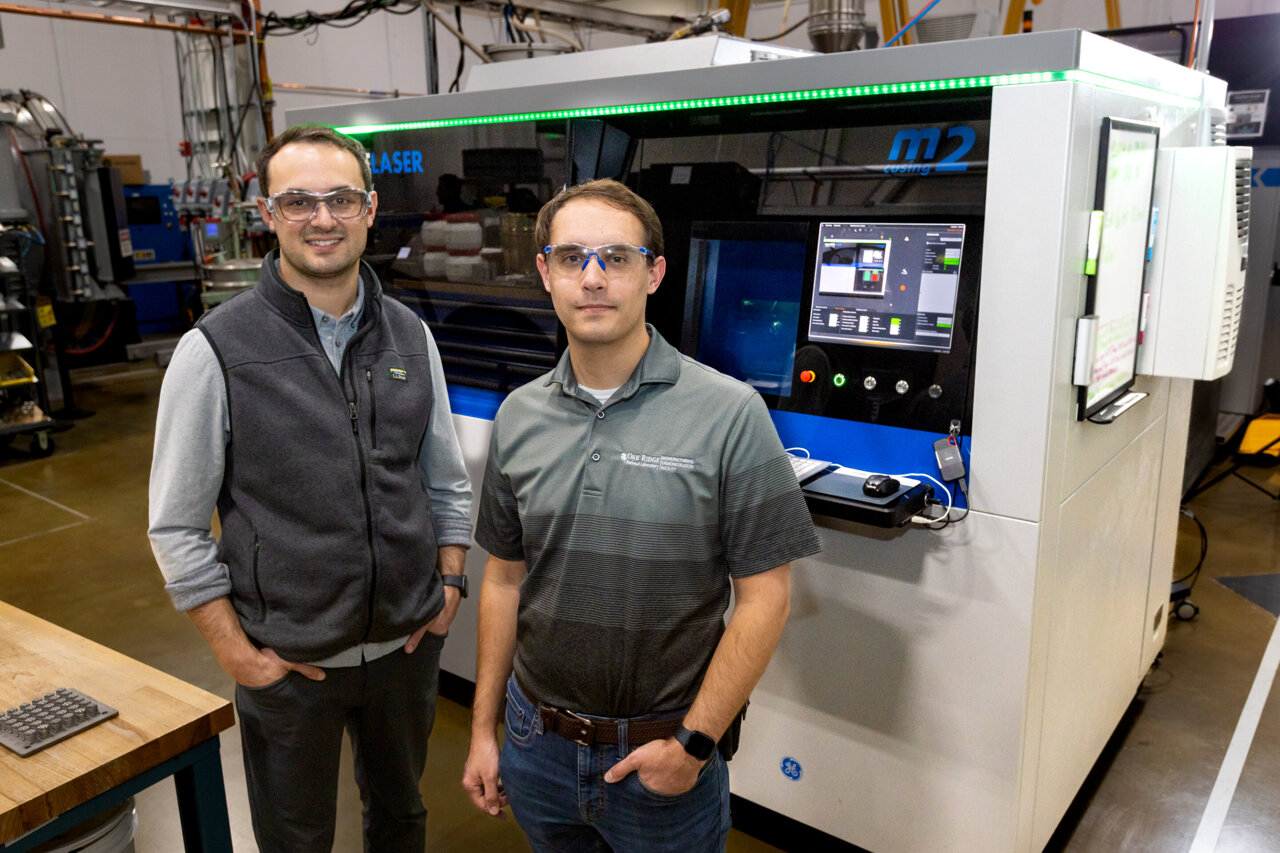
Luke Scime, a researcher in the Manufacturing Systems Analytics Group at ORNL, explained how Peregrine works. "Peregrine takes images during printing, using AI to look for anomalies," he said. "You do that for every single layer, and you build up a three-dimensional map of all the locations that might have issues, and then you try to predict which of those might cause a problem in the final part."

The custom algorithm within the Peregrine software scrutinizes the composition of edges, lines, corners, and textures by analyzing pixel values of images. This allows the system to send alerts to operators about any problems during the printing process, enabling them to make quick adjustments. This proactive approach helps ensure the quality of the final product.

One of the key features of the Peregrine software is its Dynamic Multilabel Segmentation Convolutional Neural Network (DMSCNN). This network examines data from multiple sensors to detect problems and send alerts. For instance, L-PBF prints can experience spatter, where molten material is ejected as the laser melts the metal powder. These spattered particles can land elsewhere on the part, affecting the overall quality.

The new dataset includes all DMSCNN segmentation results and fatigue-tested specimens subjected to such spatter-induced perturbations. This comprehensive ensemble of information supports the development of AI models for digital qualification of additive manufacturing processes. By using the improved open-source Peregrine dataset, researchers and manufacturers can develop even smarter, adaptive quality assurance and quality control systems for their 3D-printed parts.

Other ORNL researchers who contributed to the new dataset include Zackary Snow, Chase Joslin, William Halsey, Andres Marquez Rossy, Amir Ziabari, Vincent Paquit, and Ryan Dehoff. Their collective efforts have helped create a valuable resource for the additive manufacturing community.

For more information, refer to the following publication: Zackary Snow et al, "In situ Visible Light and Thermal Imaging Data from a Laser Powder Bed Fusion Additive Manufacturing Process Co-Registered to X-ray Computed Tomography and Fatigue Data," Oak Ridge National Laboratory (ORNL), Oak Ridge, TN (United States). Oak Ridge Leadership Computing Facility (OLCF); Oak Ridge National Laboratory (ORNL), Oak Ridge, TN (United States) (2025). DOI: 10.13139/ornlnccs/2524534.

Thursday, November 20, 2025

DIYer 3D-Prints Fix for Mini PC's Major Flaw — You Can Too

Featured Image

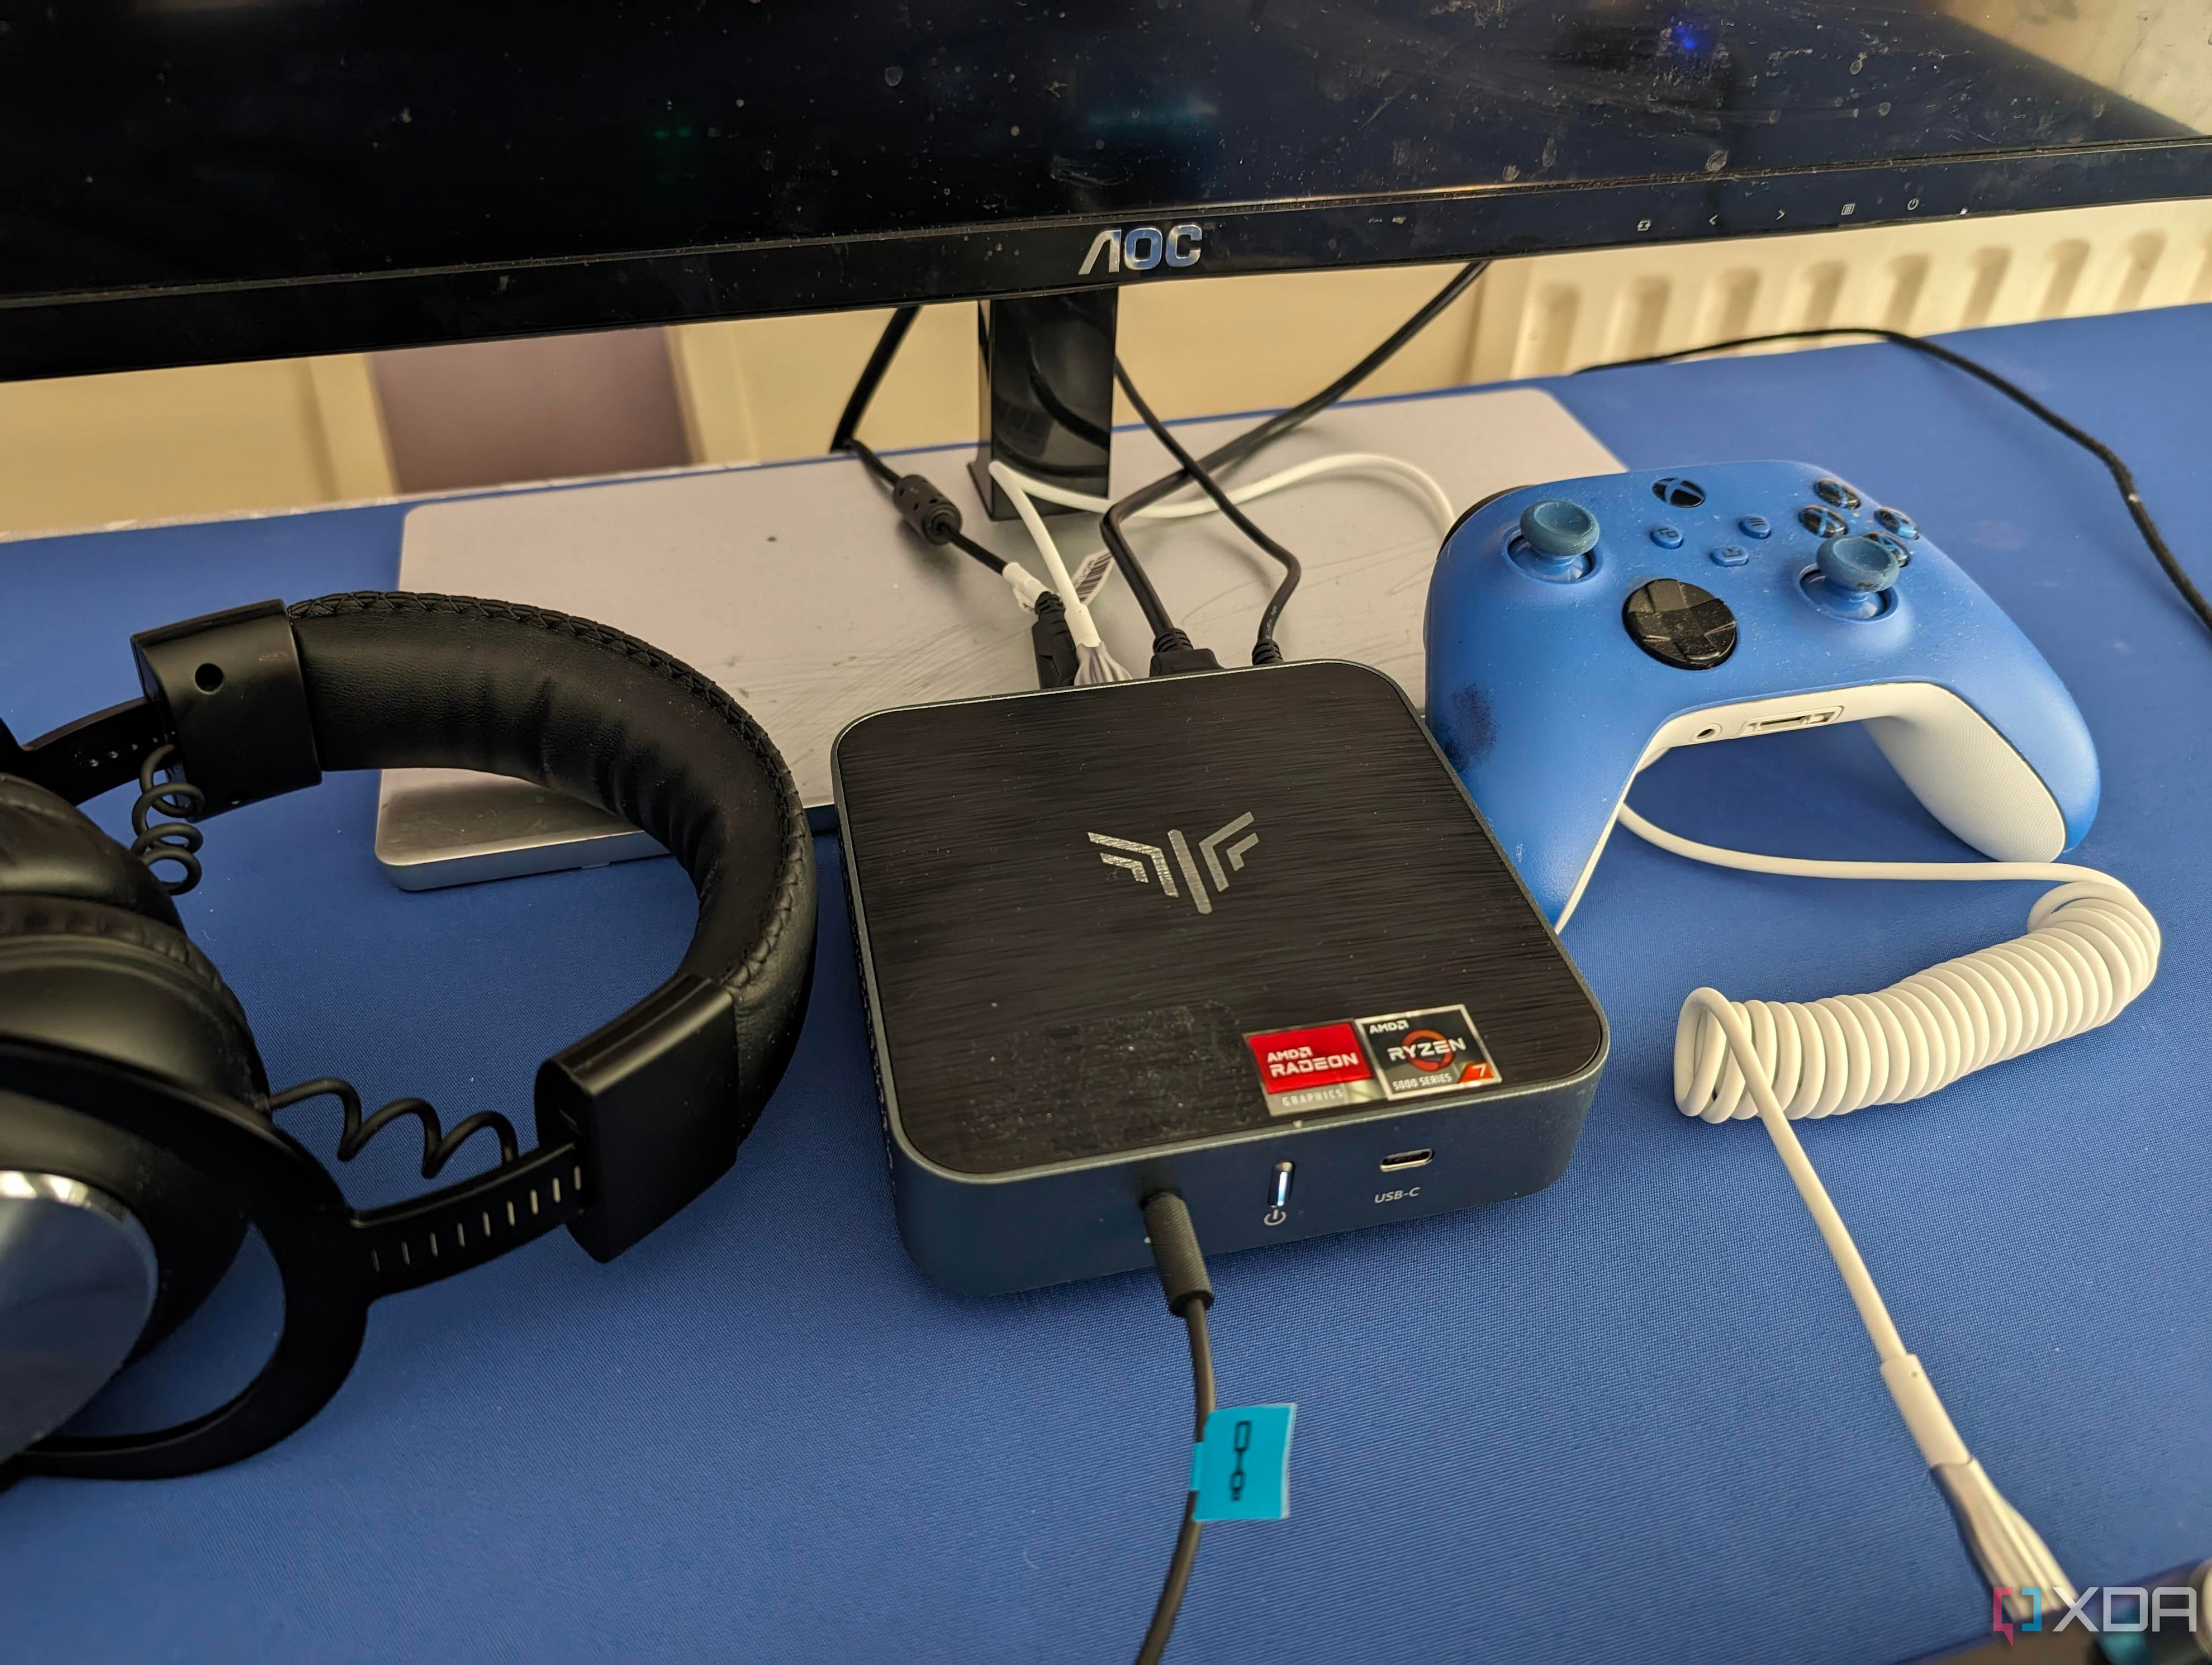
A 3D-Printed Solution to Mini PC Overheating

Mini PCs have become increasingly popular due to their compact size and powerful performance. However, one of the biggest challenges they face is overheating. Unlike larger desktops, mini PCs often lack sufficient space for robust cooling systems, making them more susceptible to heat buildup, especially during intensive tasks. Fortunately, a creative solution has emerged in the form of a 3D-printed bottom cover designed to improve airflow and keep components cooler.

This innovative fix was created specifically for the ZB-MN57 mini PC, but the design can be adapted for other models as well. The project's creator, @lixxus_3568380, developed a custom cooling plate that replaces the original bottom cover without adding extra bulk. The goal was to enhance cooling efficiency while maintaining the structural integrity of the device.

How It Works

The key to this solution lies in its design. The 3D-printed cover features honeycomb cutouts with tapered walls, which allow for improved air circulation around critical components like NVMe drives. This increased airflow helps dissipate heat more effectively, reducing the risk of overheating. Despite replacing the stock cover, the creator claims that the new design doesn’t compromise the rigidity or strength of the mini PC.

The material used for the cover is also an important factor. Instead of standard 3D printing plastics like PLA, the project uses PETG (Polyethylene Terephthalate Glycol), a material known for its durability and heat resistance. This ensures that the cover remains sturdy even under prolonged use.

Customization and Accessibility

While the design was originally tailored for the ZB-MN57, it’s not limited to that model. Users who own different mini PCs can customize the design by adjusting the parameters to match their specific dimensions. The creator has provided OpenSCAD code, which makes it easier for users to modify the design without needing to write new code from scratch.

For those interested in creating their own cooling plate, all necessary model files are available for download. These files can be used with any 3D printer that supports PETG material. Even if you don’t have a 3D printer, the project highlights the practical applications of this technology in personal computing.

Benefits for PC Enthusiasts

This DIY approach offers several advantages. It allows users to take control of their mini PC’s cooling system, potentially extending the lifespan of their hardware. Additionally, it showcases how 3D printing can be used for customization and problem-solving in the tech world.

For enthusiasts looking to build or upgrade their systems, a 3D printer can be a valuable tool. Whether it’s for creating cooling solutions or other custom parts, having access to 3D printing opens up a range of possibilities.

Conclusion

The 3D-printed cooling cover is a prime example of how innovation can address common issues in modern technology. By improving airflow and using durable materials, this solution offers a practical way to manage heat in mini PCs. With the right tools and some customization, anyone can implement this fix and enjoy a cooler, more efficient system.

DIYer 3D-Prints Fix for Mini PC's Major Flaw — You Can Too

Featured Image

A 3D-Printed Solution to Mini PC Overheating

Mini PCs have become increasingly popular due to their compact size and powerful performance. However, one of the biggest challenges they face is overheating. Unlike larger desktops, mini PCs often lack sufficient space for robust cooling systems, making them more susceptible to heat buildup, especially during intensive tasks. Fortunately, a creative solution has emerged in the form of a 3D-printed bottom cover designed to improve airflow and keep components cooler.

This innovative fix was created specifically for the ZB-MN57 mini PC, but the design can be adapted for other models as well. The project's creator, @lixxus_3568380, developed a custom cooling plate that replaces the original bottom cover without adding extra bulk. The goal was to enhance cooling efficiency while maintaining the structural integrity of the device.

How It Works

The key to this solution lies in its design. The 3D-printed cover features honeycomb cutouts with tapered walls, which allow for improved air circulation around critical components like NVMe drives. This increased airflow helps dissipate heat more effectively, reducing the risk of overheating. Despite replacing the stock cover, the creator claims that the new design doesn’t compromise the rigidity or strength of the mini PC.

The material used for the cover is also an important factor. Instead of standard 3D printing plastics like PLA, the project uses PETG (Polyethylene Terephthalate Glycol), a material known for its durability and heat resistance. This ensures that the cover remains sturdy even under prolonged use.

Customization and Accessibility

While the design was originally tailored for the ZB-MN57, it’s not limited to that model. Users who own different mini PCs can customize the design by adjusting the parameters to match their specific dimensions. The creator has provided OpenSCAD code, which makes it easier for users to modify the design without needing to write new code from scratch.

For those interested in creating their own cooling plate, all necessary model files are available for download. These files can be used with any 3D printer that supports PETG material. Even if you don’t have a 3D printer, the project highlights the practical applications of this technology in personal computing.

Benefits for PC Enthusiasts

This DIY approach offers several advantages. It allows users to take control of their mini PC’s cooling system, potentially extending the lifespan of their hardware. Additionally, it showcases how 3D printing can be used for customization and problem-solving in the tech world.

For enthusiasts looking to build or upgrade their systems, a 3D printer can be a valuable tool. Whether it’s for creating cooling solutions or other custom parts, having access to 3D printing opens up a range of possibilities.

Conclusion

The 3D-printed cooling cover is a prime example of how innovation can address common issues in modern technology. By improving airflow and using durable materials, this solution offers a practical way to manage heat in mini PCs. With the right tools and some customization, anyone can implement this fix and enjoy a cooler, more efficient system.

Saturday, August 23, 2025

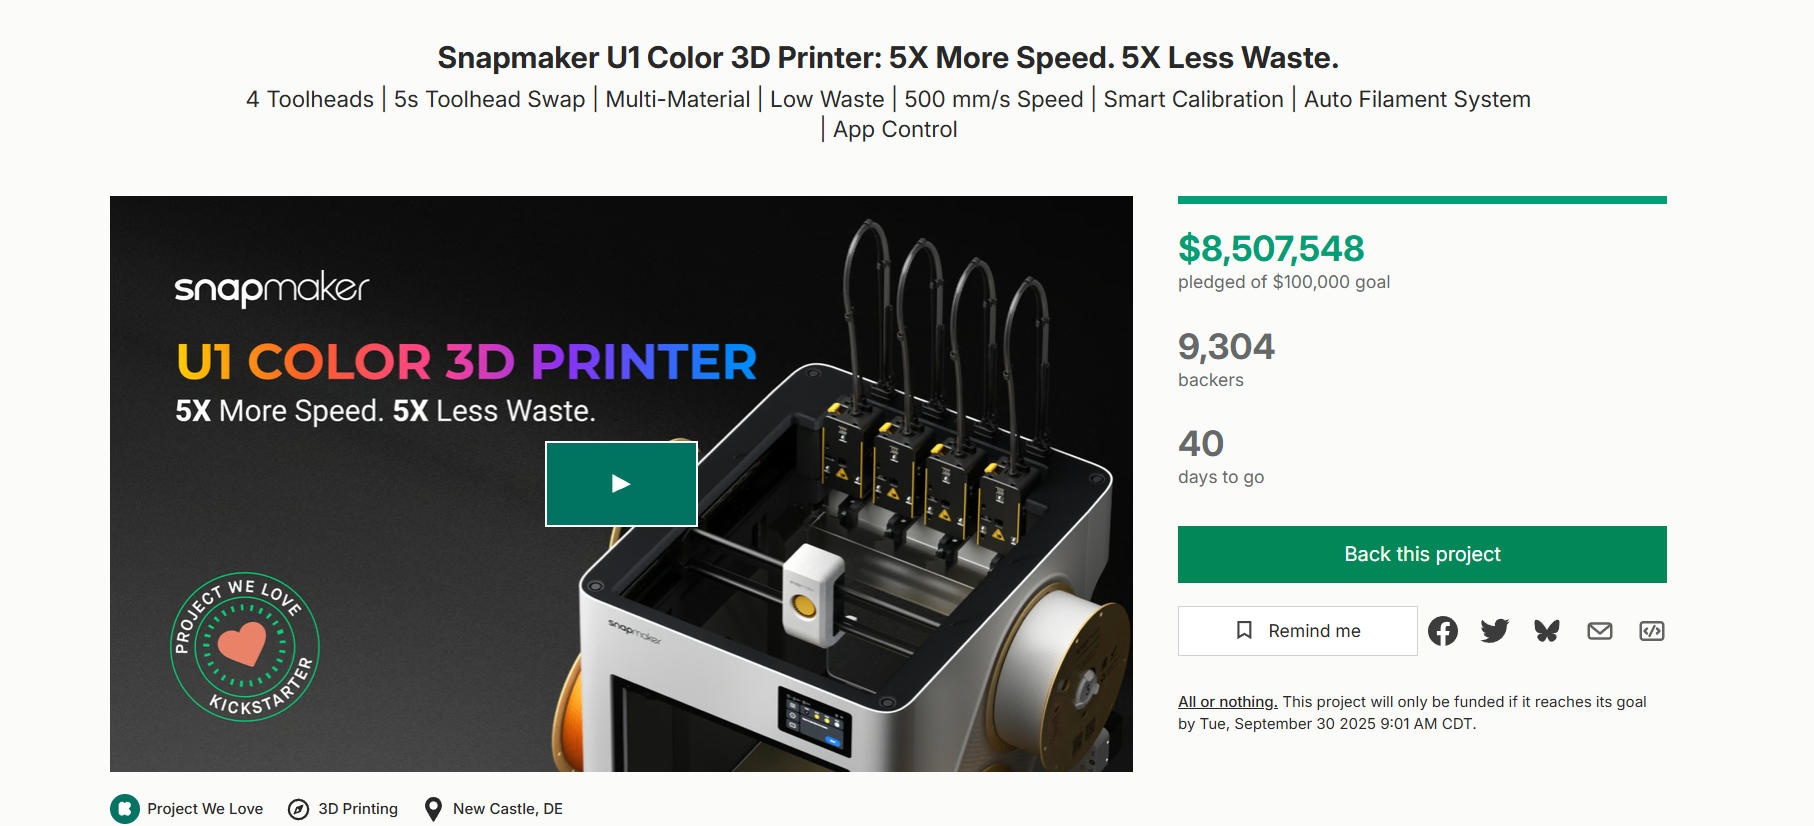
3D printer maker SnapMaker raised a staggering $7.8 million on the first day of Kickstarter for its Affordable Tool Changer, breaking Bambu's record.

Snapmaker returned to Kickstarter with a new 3D printer, the U1, and raised an astonishing $7.8 million on its first day, highlighting a strong market for 3D printing tool changers. Unlike traditional AMS-style color 3D printers, where all the spools share one filament path and one nozzle, a tool changer has a separate tool head for each spool loaded into the machine. This results in very little material wasted between color changes, the ability to mix materials with different temperature requirements, and avoids cross-contamination of filaments.

Tool changers are not especially new, but they are rare and, until now, fairly expensive. ThePrusa Research XL, a five-head tool changerWe reviewed last year, is aimed squarely at the professional market with a $3,499 price tag. By contrast, Snapmaker is appealing to the average consumer with a special early bird price of $649 and a regular Kickstarter price of $749. The four-color machine has an MSRP of $999.

We have reviewed theSnapmaker U1and found it to be a remarkable machine worthy of ourBest of 2025 3D Printer List.

The launch on Tuesday exceededBambu Lab's Kickstarter debutIn September 2022, which sold $7,047,538 worth of X1 and X1-Carbons to 5575 backers. At that time, a brand new X1-Carbon combo was priced as low as $999 for lucky early birds.

As of this writing, the Snapmaker U1 has 9304 backers, with over $8.5 million pledged. We should note that backers will not be charged until the Kickstarter completes on Sept. 29th, and backers do have the option to change their minds.

At this pace, it could beat AnkerMake's Kickstarter record for the launch of its high-speed printer, the M5, in 2022. That printer raised $8.8 million with over 11,000 backers. Sadly, AnkerMake failed to impress consumers once Bambu Lab entered the scene, delivering a Core XY machine that made the noisy M5 bed slinger, and later the screenless M5c, look like old technology. They disappointed backers by never producing a proposed six-color engine, and the company recentlyabandoned 3D printing entirely in favor of 2.5D UV printing. AnkerMake is now called EufyMake and hopes to impress aslightly different market of crafting enthusiasts.

The Snapmaker U1 could very well mark a shift in the 3D printing market toward tool changers. Go onto any forum for people who are new to 3D printing, and you'll see utter dismay at the amount of waste that multicolor printing produces. This is not only bad for your filament budget, but bad for the environment, as 3D printing plastic is not easy to recycle or accepted by most community waste management companies.

Early-bird backers are still in luck: the U1 is available at $749, with a special $30 refundable reservation deposit that unlocks $100 cashback, bringing the effective price down to $679 - a strong incentive for those ready to support the future of tooling right now,snapmaker.com.

Like this article? For more stories like this, follow us on MSN by clicking the +Follow button at the top of this page.

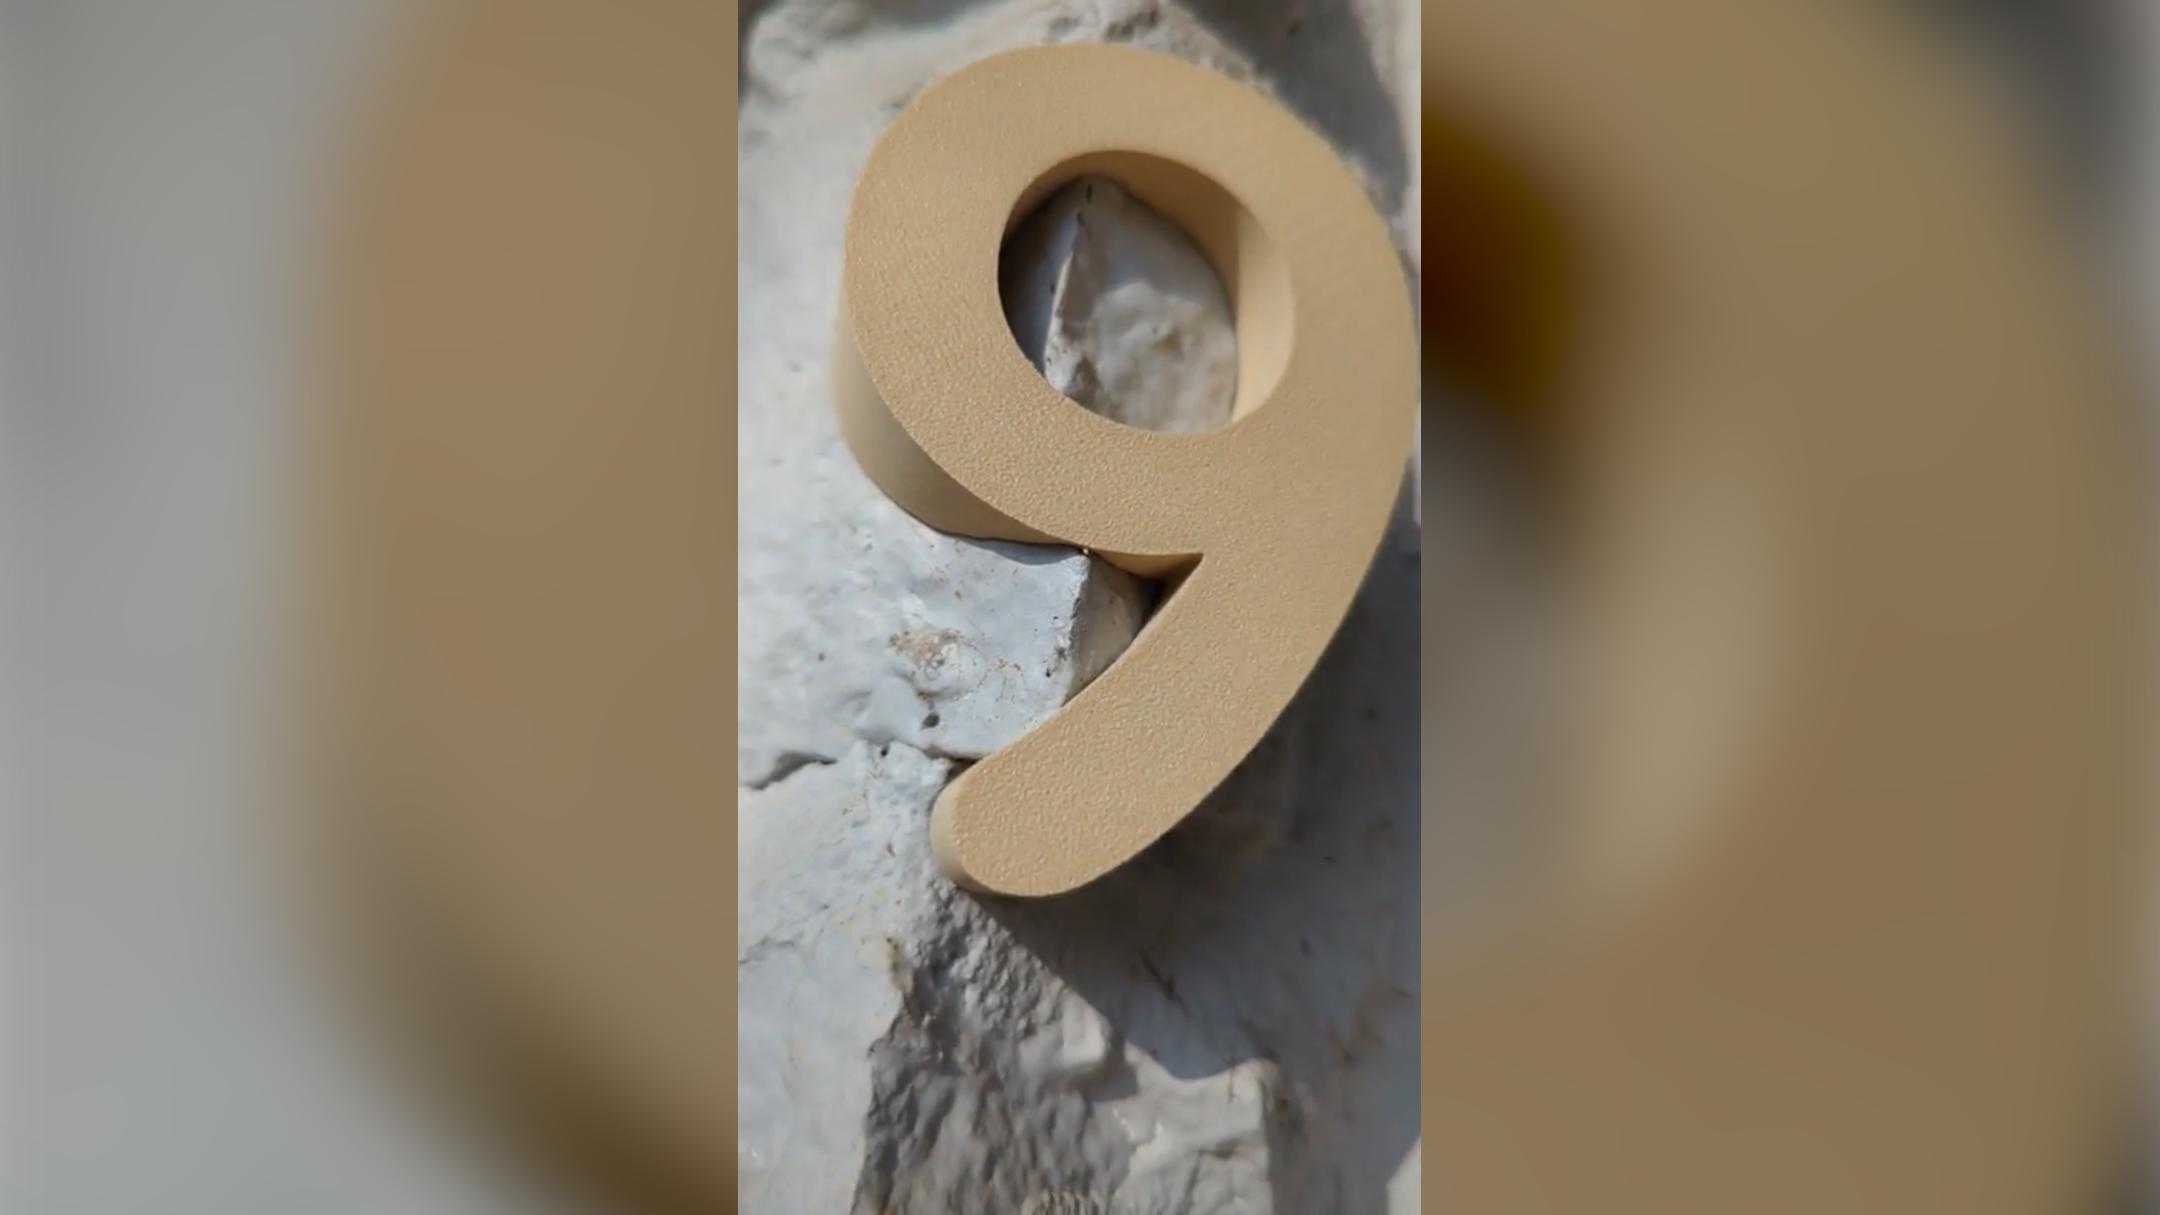
This genius combined a 3D scanner with a 3D printer to create the coolest house number I've ever seen.

  • Use 3D scanning and printing to match the wall's texture so the numbers sit flush and look 'emerging'.
  • Scan a surface, boolean the shape in Blender, then print — it fits like a puzzle piece.
  • This trick opens endless applications: any printed part can be shaped to match real-world surfaces.

If the only tool you have is a hammer, you tend to see every problem as a nail. Similarly, if the only tool you have is a 3D printer, every problem can be fixed with a 3D print. Okay, granted, you can actually own atonof tools and still see everything as something you can fix with a spool of filament, but my point still stands.

Anyway, the next time you need a new house number made, you could try 3D printing it. And if you don't want just another boring old design, you can take inspiration from this 3D printing wizard who mapped out their house's wall and printed out a number that looks like it's "emerging" from the wall, and it's honestly genius.

This 3D-printed house number uses a 3D wall scan to achieve a cool effect

In a post on the 3D printing subreddit, user derekelliott showed off their latest project. It's a 3D-printed house number with a back that perfectly matches the nooks and crannies of their house's exterior wall. It gives the illusion that the number is "growing" out of the house, or perhaps the house is slowly consuming it. Either way, it's cool.

Check it out in the video below:

So, how did they do it? Well, they combined two technologies: 3D scanning and 3D printing. Using a 3D scanner, they scanned the section of the wall where they wanted to install the number. This gave them an accurate 3D model of the wall, down to the little bumps and crevices.

Then, they designed a house number in the font they wanted. Before printing it, they took the 3D model of their house wall and made an indent on the back of the number that matches its topology. Now the number will fit on the real-world wall like a puzzle piece, giving a lovely flush finish that gives the illusion that the number is part of the wall itself.

Here's how the creator explained it:

Needed new house numbers and thought it would be fun to use the 3D scanner to replicate the stone wall and then use a simple boolean in Blender to cut the shape from an extruded number.

The numbers were eventually printed in black and placed on the flat(ter) face, not the corner.

Honestly, I would have never thought of this, but now that I've seen it, I wonder how many different applications there are for 3D scanners and 3D printers working together. If you want a 3D print to fit flush on something, you can scan it in and print something designed to match its exact shape. The possibilities are endless, really.

If you want to check out this technology, make sure to read about when one of our writerstried using a 3D scanner to prepare their 3D printing files and were left amazed.

I 3D printed my way out of IKEA's part replacement policies

The world of tabletop 3D printing has shed its skin of being an esoteric, expensive hobby reserved for engineers and hardcore tinkerers, even though they may be at a slight advantage. Today,getting a capable 3D printeris more accessible and affordable than ever, turning what was once a niche technology into a practical household tool. Converting spools of plastic into unique and functional parts is fun, but you can easily expand your horizons beyond the creations of the printing community. I've found3D printing particularly usefulfor identifying the problems I face and creating customized solutions.

Adopting this approach also makes you a contributor to the thriving community, sinceyour models may prove usefulas well. Repositories like Printables and Thingiverse are a testament to this collaborative spirit, hosting millions of free models for everything from cable clips to complex assemblies. A slight shift in perspective helped when a beloved IKEA work lamp failed me. It started with a wobble before cracks appeared in the base, but when I reached out to IKEA for a simple spare part, their response was a bureaucratic shrug and a suggestion to buy a new lamp. Infuriated by the wastefulness, I struck gold with my second attempt at 3D printing a solution.

Corporate indifference and consumerism pushed me over the edge

An entirely avoidable problem

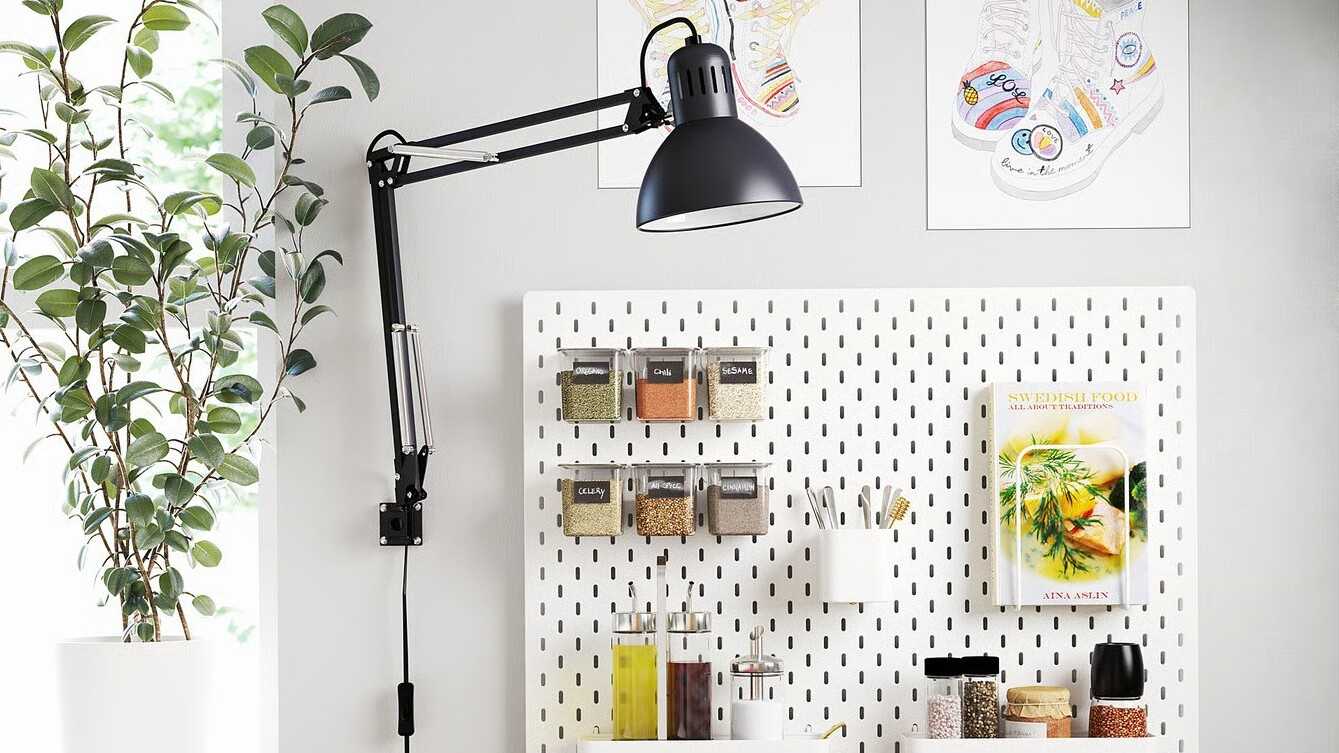
IKEA's product lineupfeatures several long-standing designs, such as theThird work lampintroduced in 1998.I picked one in a matte gray finish a few years ago to complete my desk setup. It's a simple, articulated arm lamp that does its job well, but it comes with a catch: it doesn't include a freestanding base. Your only options out of the box are either to screw a small mount directly into your wall or use the included C-clamp to attach it to the edge of your desk. Besides the L-shaped flange and nut threaded on it for clamping, all the parts are polymer or plastic.

I opted for the desk clamp because of its impermanence, and for the first couple of years, it was okay. There was a fair amount of wobble when I wrote on the desk, but it provided excellent task lighting for late-night work and hobbies. Gradually, this wobble worsened into a constant, irritating jiggle every time I bumped my desk. A quick investigation revealed that the plastic C-clamp base was cracking under constant stress. The very part responsible for holding the entire metal lamp steady was failing. I wasn't worried yet since IKEA emphasizes design, and I assumed they would supply a replacement clamp from their stockpile to address this known issue.

The customer support response was frustrating and predictable - the clamp isn't sold or supplied separately, and the official recommendation was to buy a new lamp. The thought of discarding my perfectly good one and contributing to a landfill over one little plastic bit left a sour taste in my mouth. I decided that if IKEA didn't solve my problem, I'd solve it myself with CAD and 3D printing.

Attempt one: A flawed replica

I should have known better

Since my original ternary clamp had cracked, but was still in one piece, I measured it with Vernier calipers and replicated it in CAD software, just stewing over the wastefulness. The reverse-engineered clamp was ready to print within the hour, and the result was cathartic. I was taking back control from a company that just wanted me to be a repeat consumer, and 3D printing helped replace a broken part without spending a dime. However, my triumph was short-lived.

As I used the lamp over the next few days, I realized my fundamental mistake: I had faithfully replicated a flawed design. In addition to the weakness induced by the3D printed infill pattern, this part was just as susceptible to the same stresses that broke the original solid plastic piece. This was merely a temporary solution.

Attempt two: Upcycling with a vengeance

Numerous improvements

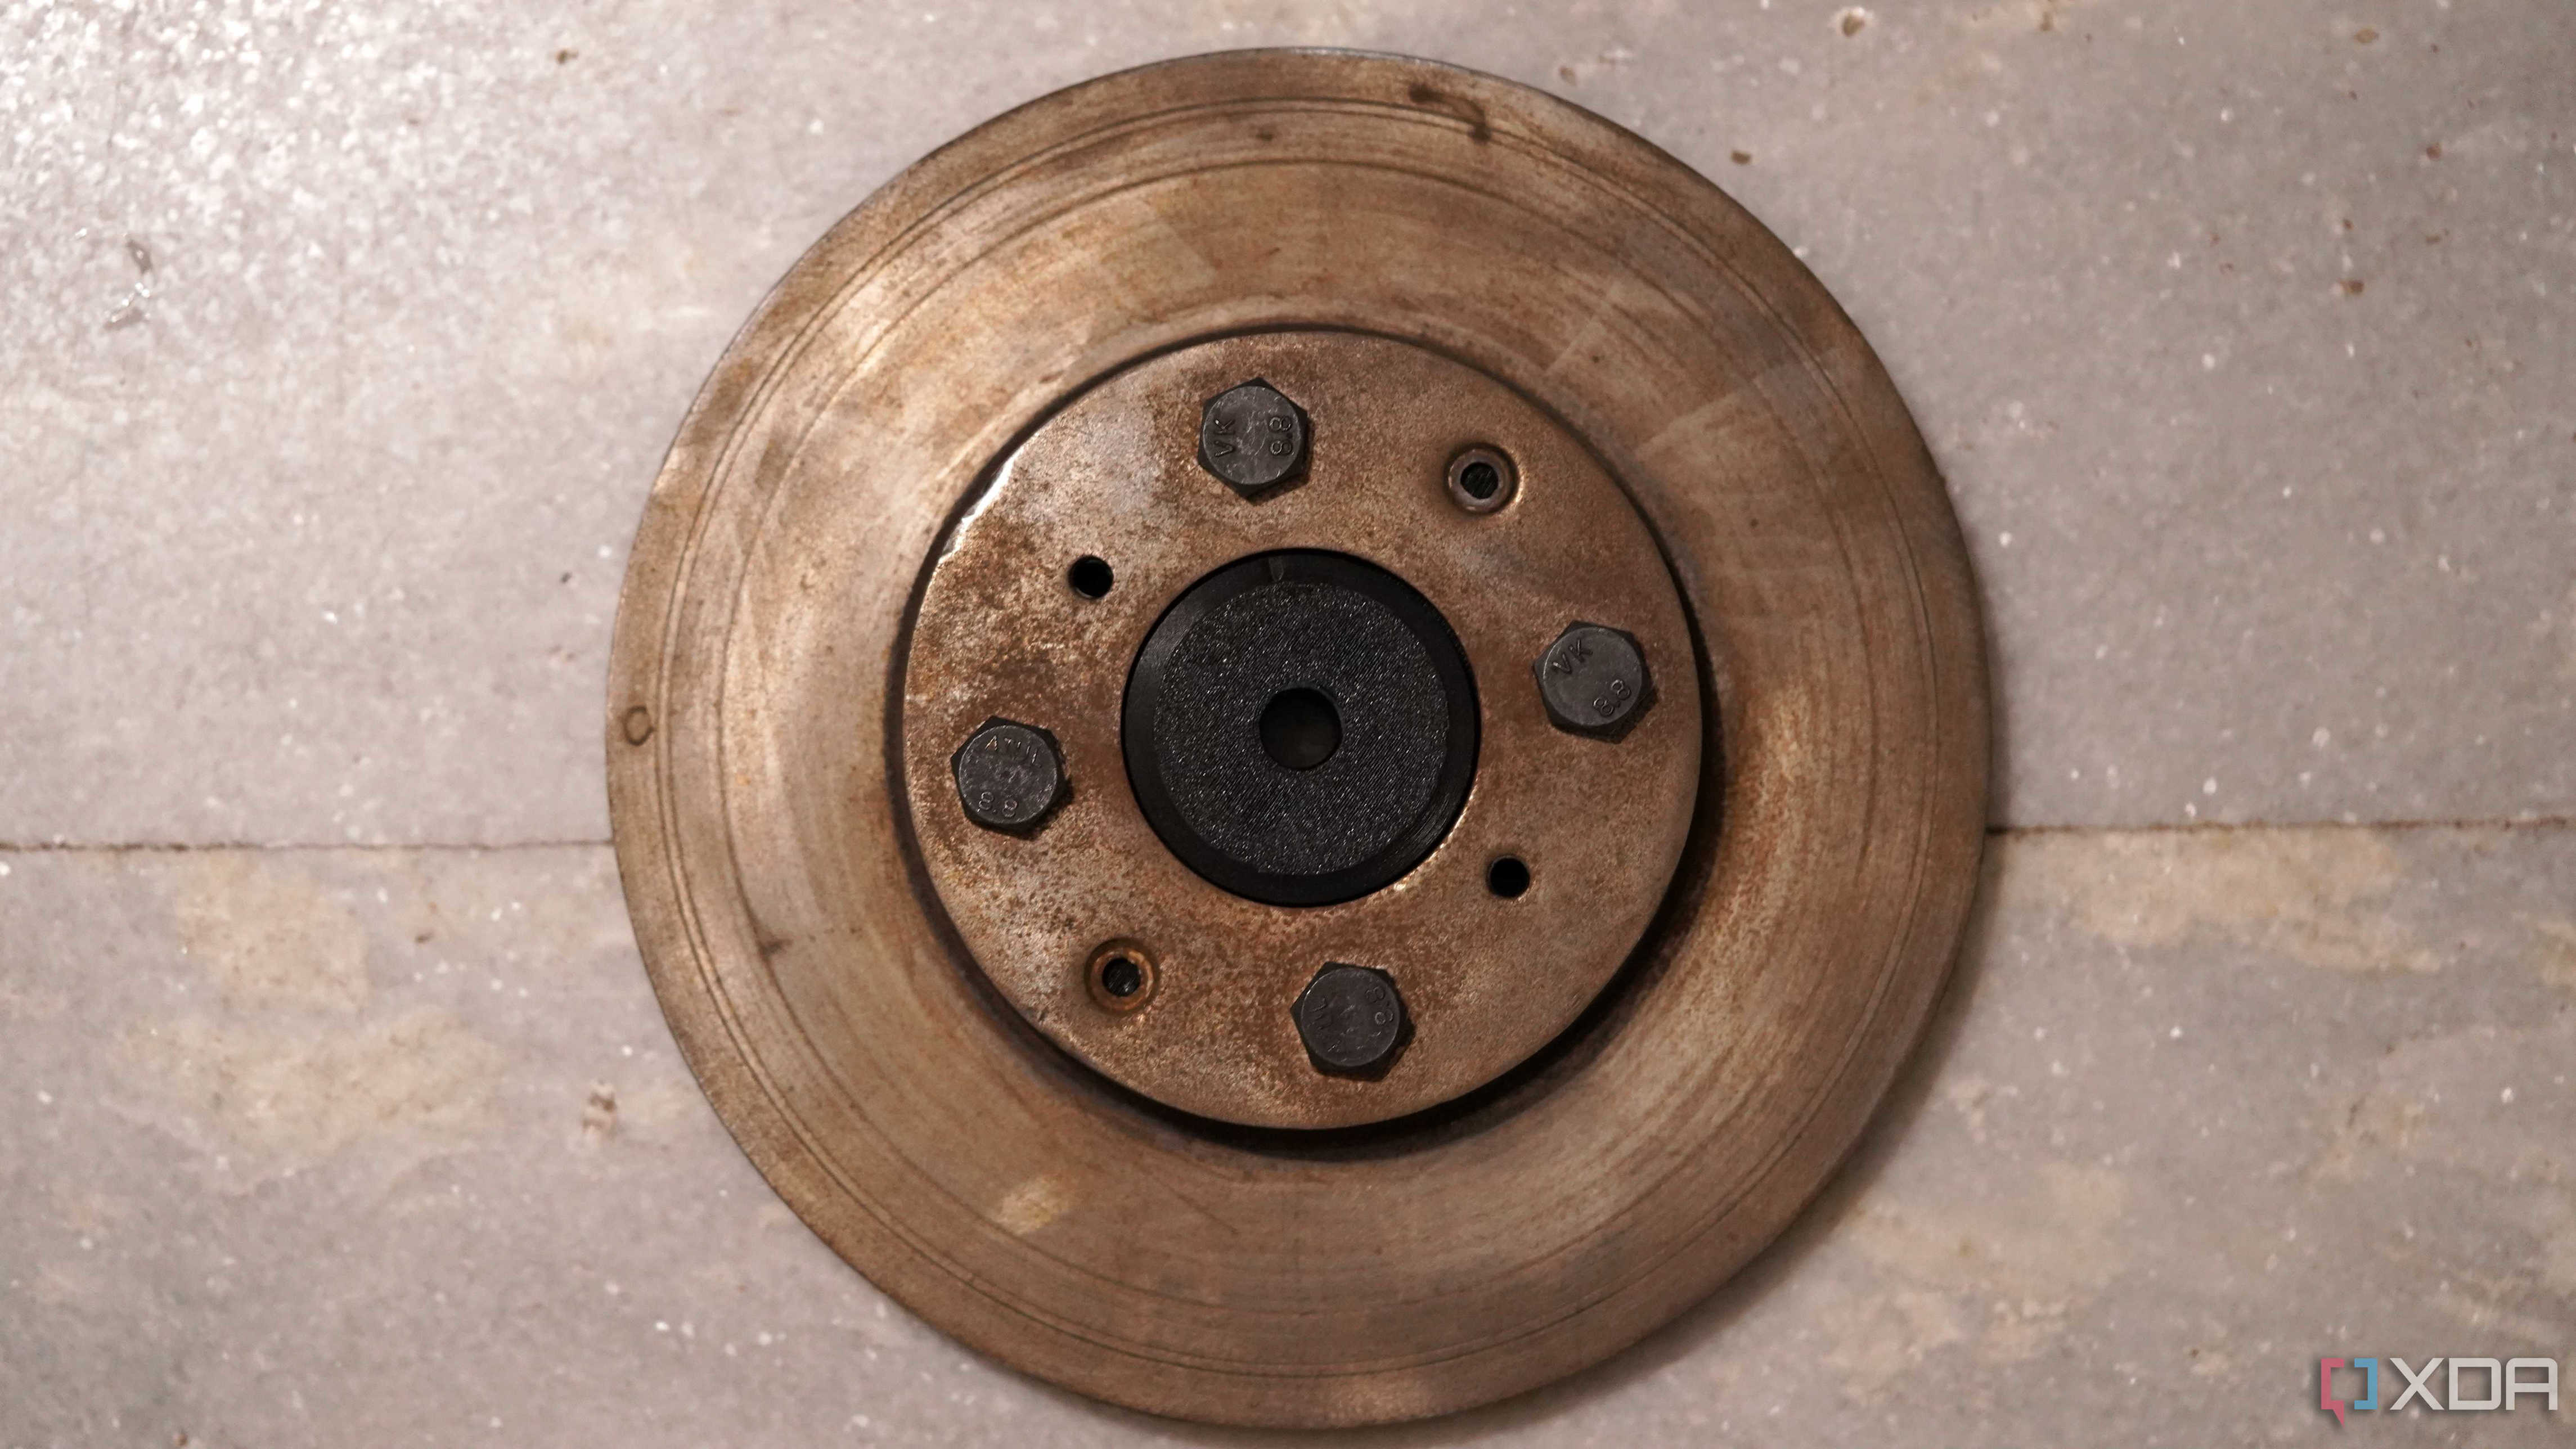
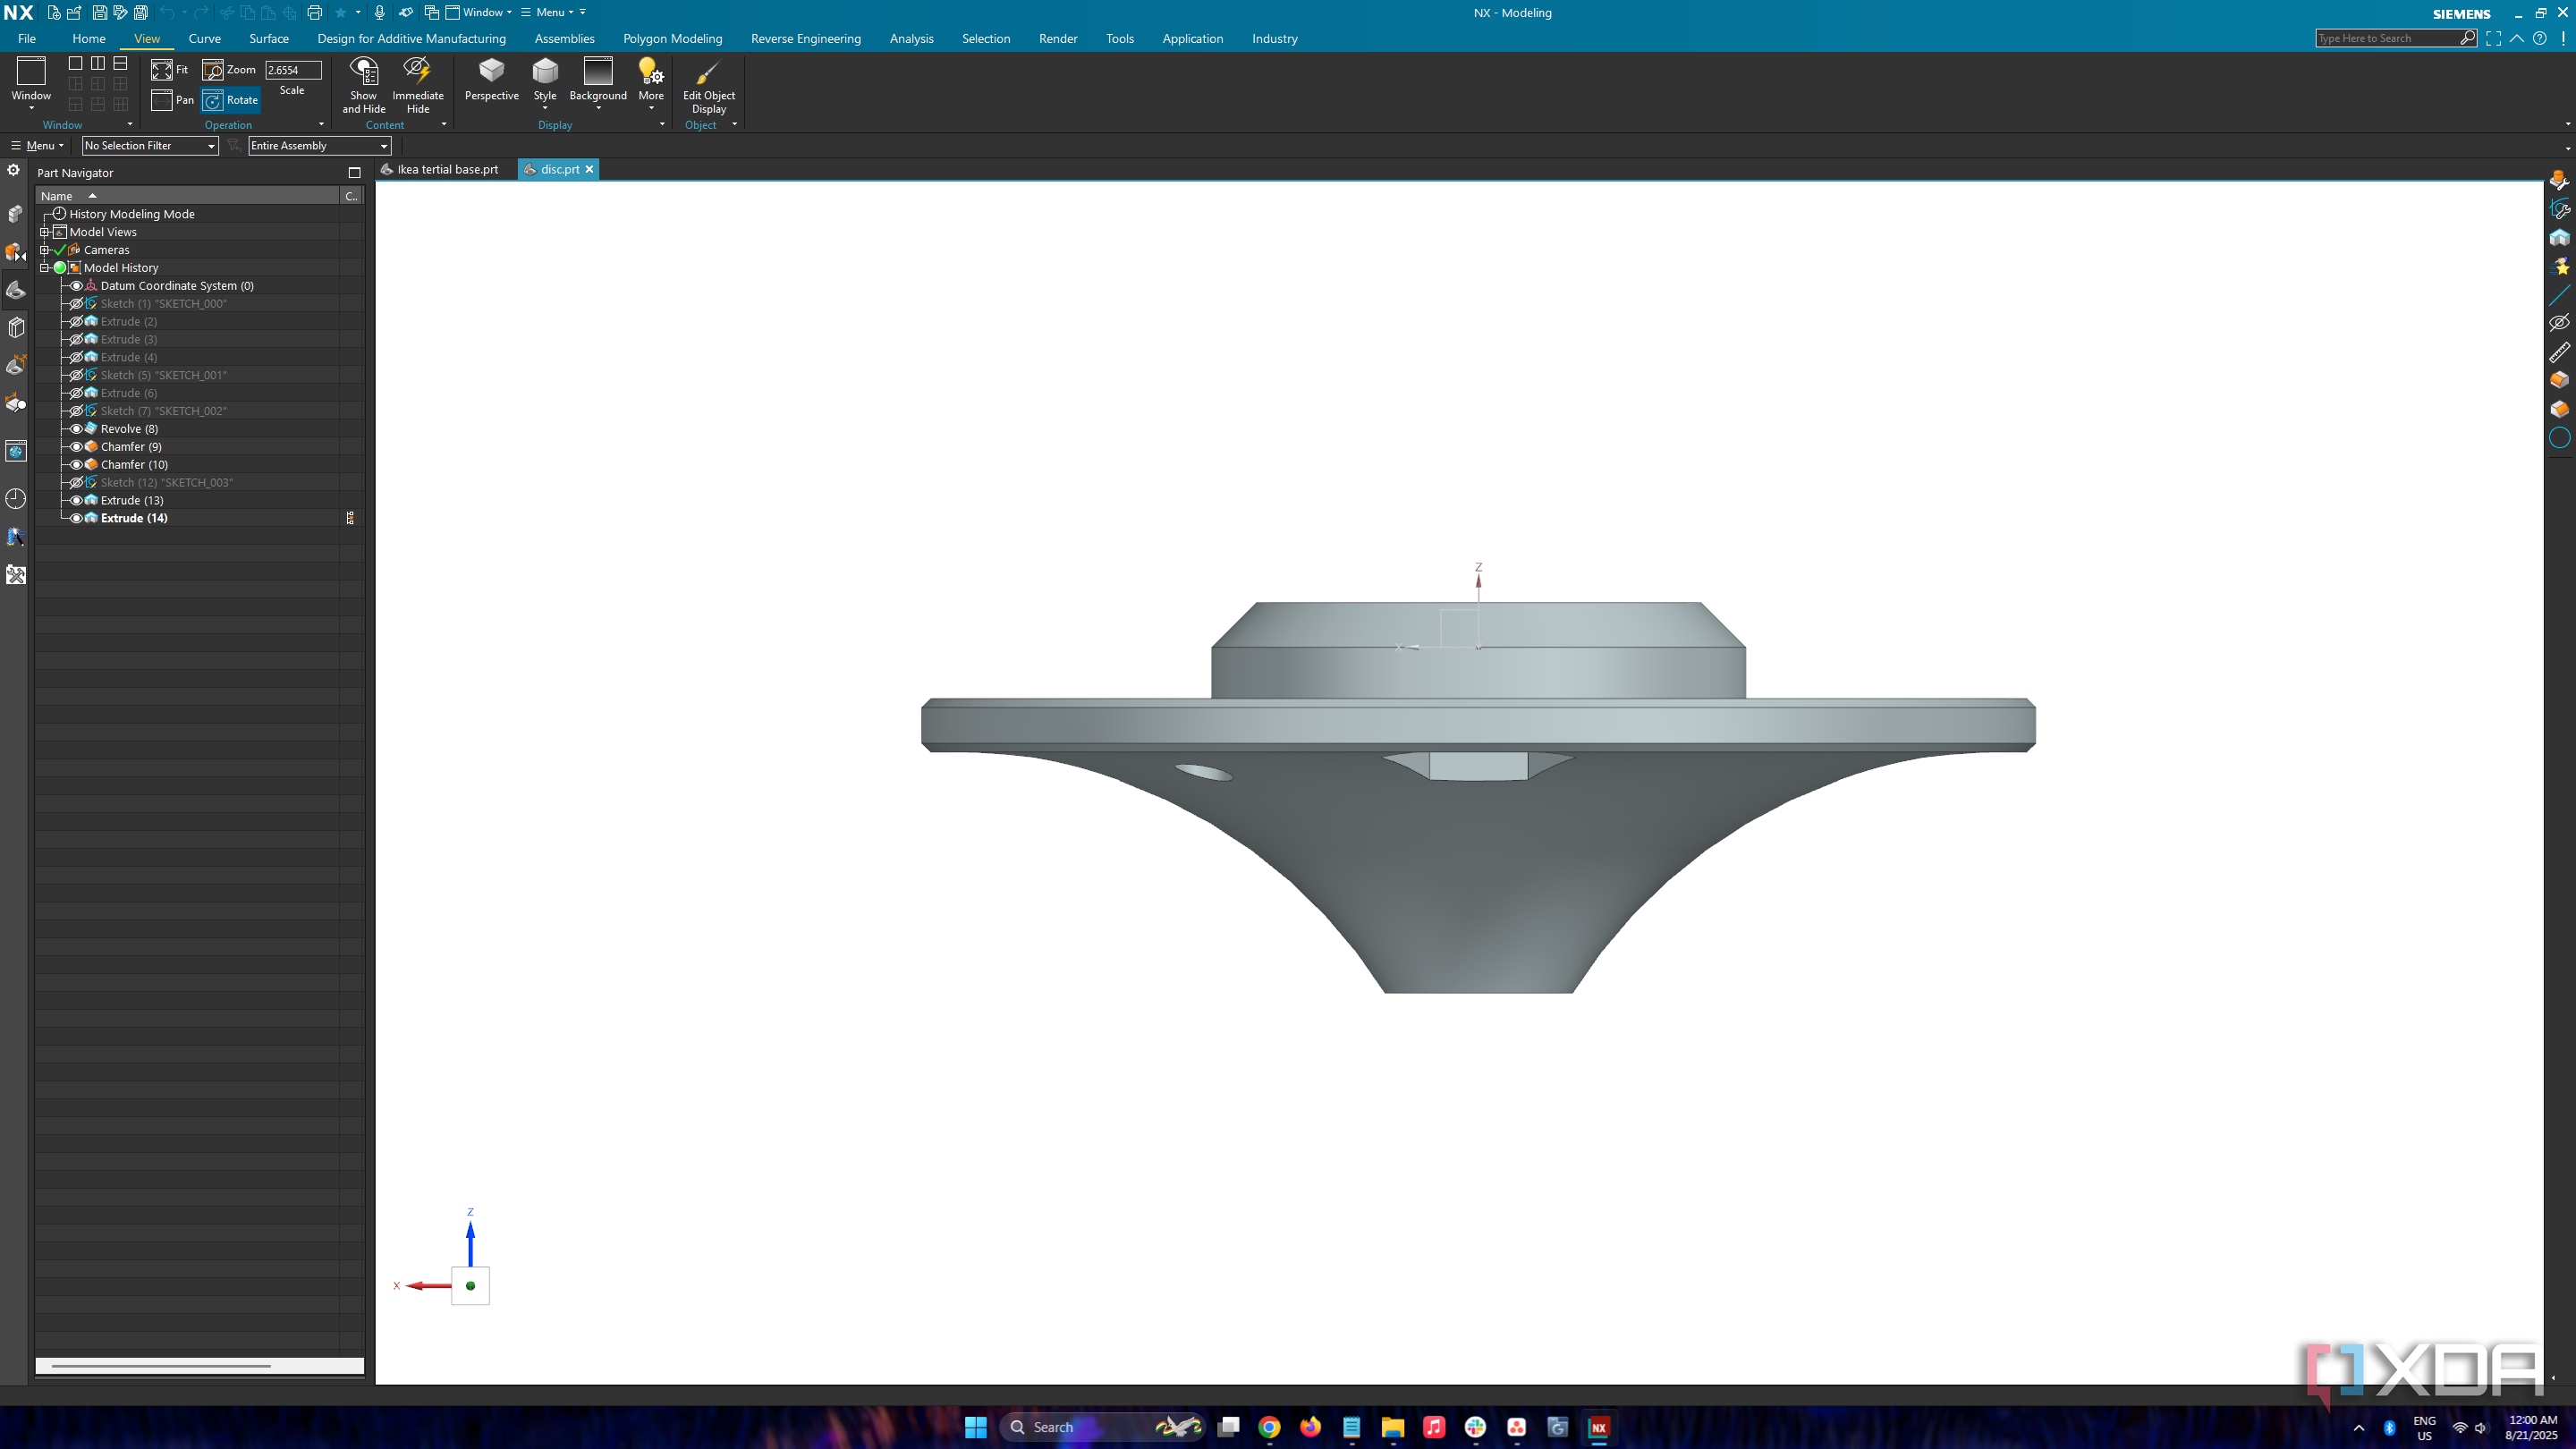
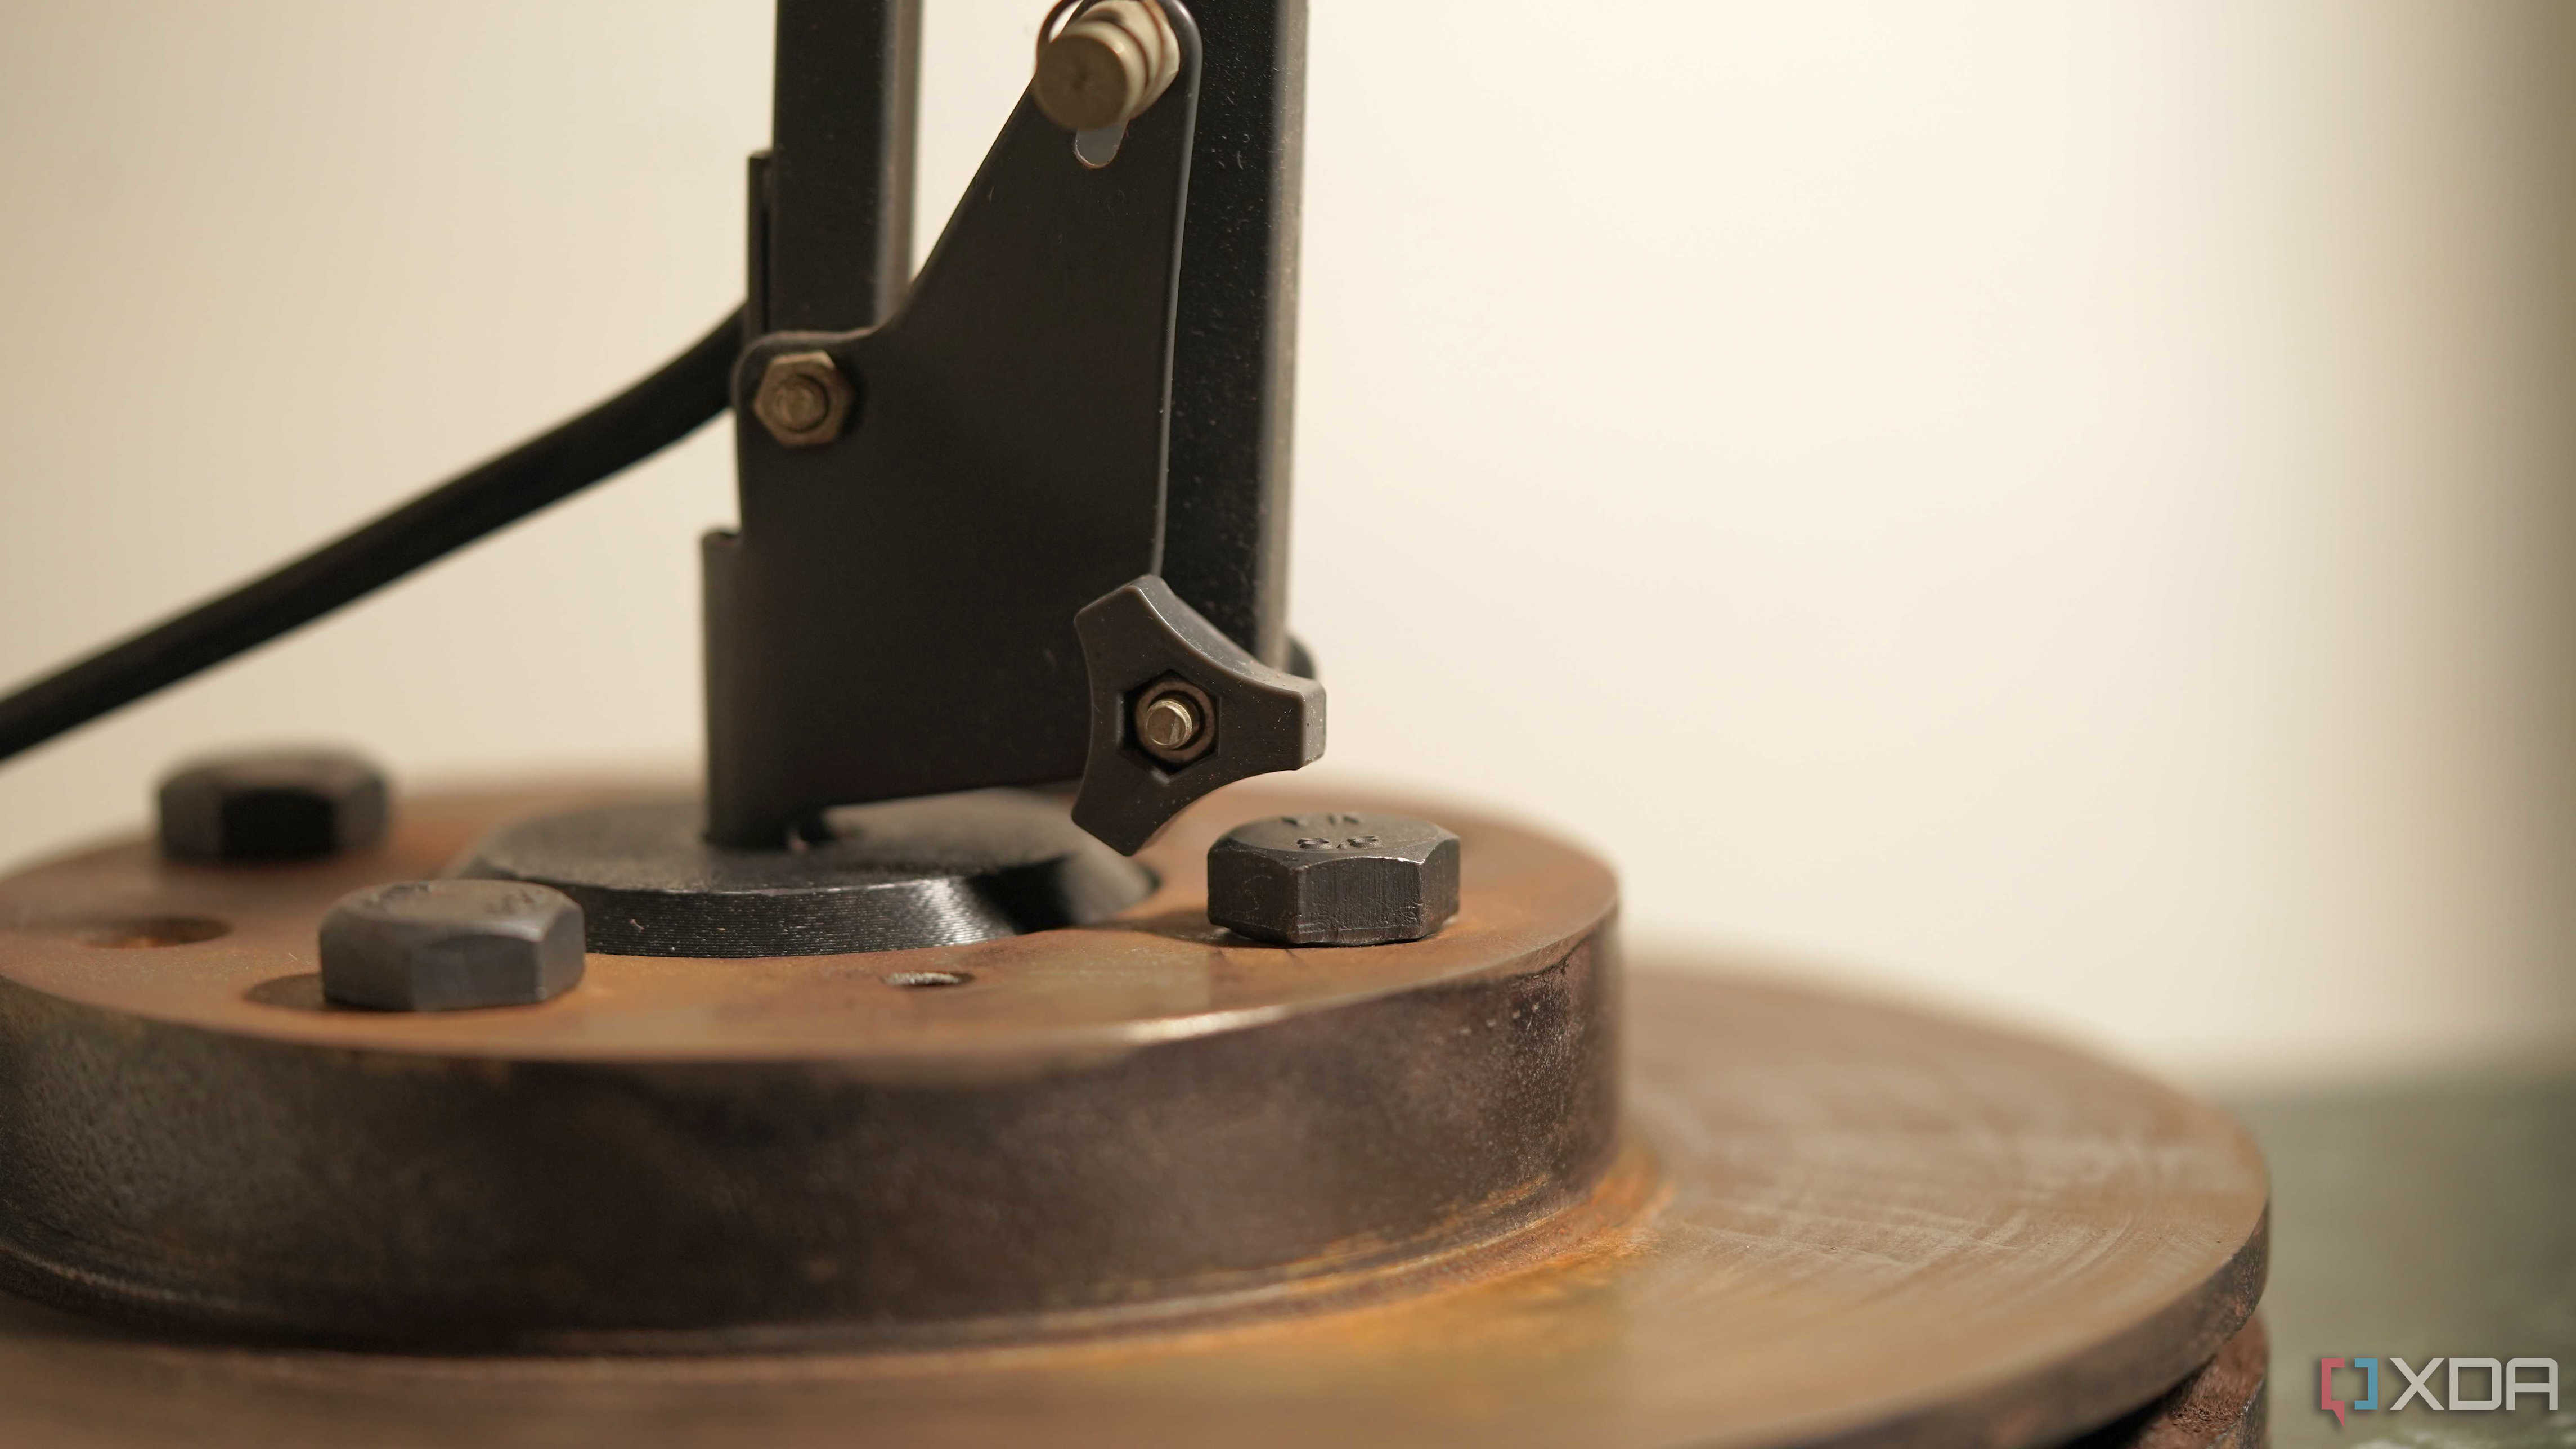
I needed a proper, heavy, freestanding base for the lamp to replace the clamp. It would take up more room on the desk, but a larger footprint would guarantee stability as well. Right on time, my car's brake rotors were replaced, and I could either scrap the large cast iron disks, or upcycle at least one into a tertiary base while I turned the other into a cool desk clock. The rotor's design was perfectly suitable as well. It had a perfectly flat base and a large central hole for the wheel hub. For my application, I needed to design and 3D print an adapter that tightens the central hole for the tertiary's slim shaft. The bottom of the adapter flared out into a wide, flat disc with four holes that aligned with the lug nut holes on the brake rotor.

This time I didn't need the plastic heft, so I printed at just 20% infill, and threw in four short bolts. The nuts are held captive by design in the plastic part, so you can tighten them from the top without lifting the heavy rotor. The 3D-printed adapter dropped into place perfectly. I inserted the lamp stem and then used four bolts to fasten the adapter securely. The result was tight tolerances and a friction fit with the tertial shaft that allowed zero wobble.

Practical solutions take the cake

This new setup has been in service for more than a year now, and flawlessly so. The utilitarian cast iron is a fantastic conversation starter, but my favorite part is how the print isn't permanent. If I ever replace the lamp, I can simply unbolt the adapter and repurpose the brake rotor for another project. This simple fix was only possible because of the accessibility of 3D printing. It allowed me to bridge the gap between two completely unrelated objects, creating a functional and aesthetically pleasing solution to a real-world problem. This hobby runs deeper than Thingiverse and Printables if you dare push back against the throwaway culture we're so accustomed to.

All it takes is a little design skill, digital calipers, a practical problem you're facing, and the imagination to solve it all. There's so muchyou'll never buy again once you get to 3D printinginstead.