Showing posts with label diy. Show all posts

Thursday, November 20, 2025

DIYer 3D-Prints Fix for Mini PC's Major Flaw — You Can Too

Featured Image

A 3D-Printed Solution to Mini PC Overheating

Mini PCs have become increasingly popular due to their compact size and powerful performance. However, one of the biggest challenges they face is overheating. Unlike larger desktops, mini PCs often lack sufficient space for robust cooling systems, making them more susceptible to heat buildup, especially during intensive tasks. Fortunately, a creative solution has emerged in the form of a 3D-printed bottom cover designed to improve airflow and keep components cooler.

This innovative fix was created specifically for the ZB-MN57 mini PC, but the design can be adapted for other models as well. The project's creator, @lixxus_3568380, developed a custom cooling plate that replaces the original bottom cover without adding extra bulk. The goal was to enhance cooling efficiency while maintaining the structural integrity of the device.

How It Works

The key to this solution lies in its design. The 3D-printed cover features honeycomb cutouts with tapered walls, which allow for improved air circulation around critical components like NVMe drives. This increased airflow helps dissipate heat more effectively, reducing the risk of overheating. Despite replacing the stock cover, the creator claims that the new design doesn’t compromise the rigidity or strength of the mini PC.

The material used for the cover is also an important factor. Instead of standard 3D printing plastics like PLA, the project uses PETG (Polyethylene Terephthalate Glycol), a material known for its durability and heat resistance. This ensures that the cover remains sturdy even under prolonged use.

Customization and Accessibility

While the design was originally tailored for the ZB-MN57, it’s not limited to that model. Users who own different mini PCs can customize the design by adjusting the parameters to match their specific dimensions. The creator has provided OpenSCAD code, which makes it easier for users to modify the design without needing to write new code from scratch.

For those interested in creating their own cooling plate, all necessary model files are available for download. These files can be used with any 3D printer that supports PETG material. Even if you don’t have a 3D printer, the project highlights the practical applications of this technology in personal computing.

Benefits for PC Enthusiasts

This DIY approach offers several advantages. It allows users to take control of their mini PC’s cooling system, potentially extending the lifespan of their hardware. Additionally, it showcases how 3D printing can be used for customization and problem-solving in the tech world.

For enthusiasts looking to build or upgrade their systems, a 3D printer can be a valuable tool. Whether it’s for creating cooling solutions or other custom parts, having access to 3D printing opens up a range of possibilities.

Conclusion

The 3D-printed cooling cover is a prime example of how innovation can address common issues in modern technology. By improving airflow and using durable materials, this solution offers a practical way to manage heat in mini PCs. With the right tools and some customization, anyone can implement this fix and enjoy a cooler, more efficient system.

DIYer 3D-Prints Fix for Mini PC's Major Flaw — You Can Too

Featured Image

A 3D-Printed Solution to Mini PC Overheating

Mini PCs have become increasingly popular due to their compact size and powerful performance. However, one of the biggest challenges they face is overheating. Unlike larger desktops, mini PCs often lack sufficient space for robust cooling systems, making them more susceptible to heat buildup, especially during intensive tasks. Fortunately, a creative solution has emerged in the form of a 3D-printed bottom cover designed to improve airflow and keep components cooler.

This innovative fix was created specifically for the ZB-MN57 mini PC, but the design can be adapted for other models as well. The project's creator, @lixxus_3568380, developed a custom cooling plate that replaces the original bottom cover without adding extra bulk. The goal was to enhance cooling efficiency while maintaining the structural integrity of the device.

How It Works

The key to this solution lies in its design. The 3D-printed cover features honeycomb cutouts with tapered walls, which allow for improved air circulation around critical components like NVMe drives. This increased airflow helps dissipate heat more effectively, reducing the risk of overheating. Despite replacing the stock cover, the creator claims that the new design doesn’t compromise the rigidity or strength of the mini PC.

The material used for the cover is also an important factor. Instead of standard 3D printing plastics like PLA, the project uses PETG (Polyethylene Terephthalate Glycol), a material known for its durability and heat resistance. This ensures that the cover remains sturdy even under prolonged use.

Customization and Accessibility

While the design was originally tailored for the ZB-MN57, it’s not limited to that model. Users who own different mini PCs can customize the design by adjusting the parameters to match their specific dimensions. The creator has provided OpenSCAD code, which makes it easier for users to modify the design without needing to write new code from scratch.

For those interested in creating their own cooling plate, all necessary model files are available for download. These files can be used with any 3D printer that supports PETG material. Even if you don’t have a 3D printer, the project highlights the practical applications of this technology in personal computing.

Benefits for PC Enthusiasts

This DIY approach offers several advantages. It allows users to take control of their mini PC’s cooling system, potentially extending the lifespan of their hardware. Additionally, it showcases how 3D printing can be used for customization and problem-solving in the tech world.

For enthusiasts looking to build or upgrade their systems, a 3D printer can be a valuable tool. Whether it’s for creating cooling solutions or other custom parts, having access to 3D printing opens up a range of possibilities.

Conclusion

The 3D-printed cooling cover is a prime example of how innovation can address common issues in modern technology. By improving airflow and using durable materials, this solution offers a practical way to manage heat in mini PCs. With the right tools and some customization, anyone can implement this fix and enjoy a cooler, more efficient system.
Saturday, August 23, 2025

I 3D printed my way out of IKEA's part replacement policies

The world of tabletop 3D printing has shed its skin of being an esoteric, expensive hobby reserved for engineers and hardcore tinkerers, even though they may be at a slight advantage. Today,getting a capable 3D printeris more accessible and affordable than ever, turning what was once a niche technology into a practical household tool. Converting spools of plastic into unique and functional parts is fun, but you can easily expand your horizons beyond the creations of the printing community. I've found3D printing particularly usefulfor identifying the problems I face and creating customized solutions.

Adopting this approach also makes you a contributor to the thriving community, sinceyour models may prove usefulas well. Repositories like Printables and Thingiverse are a testament to this collaborative spirit, hosting millions of free models for everything from cable clips to complex assemblies. A slight shift in perspective helped when a beloved IKEA work lamp failed me. It started with a wobble before cracks appeared in the base, but when I reached out to IKEA for a simple spare part, their response was a bureaucratic shrug and a suggestion to buy a new lamp. Infuriated by the wastefulness, I struck gold with my second attempt at 3D printing a solution.

Corporate indifference and consumerism pushed me over the edge

An entirely avoidable problem

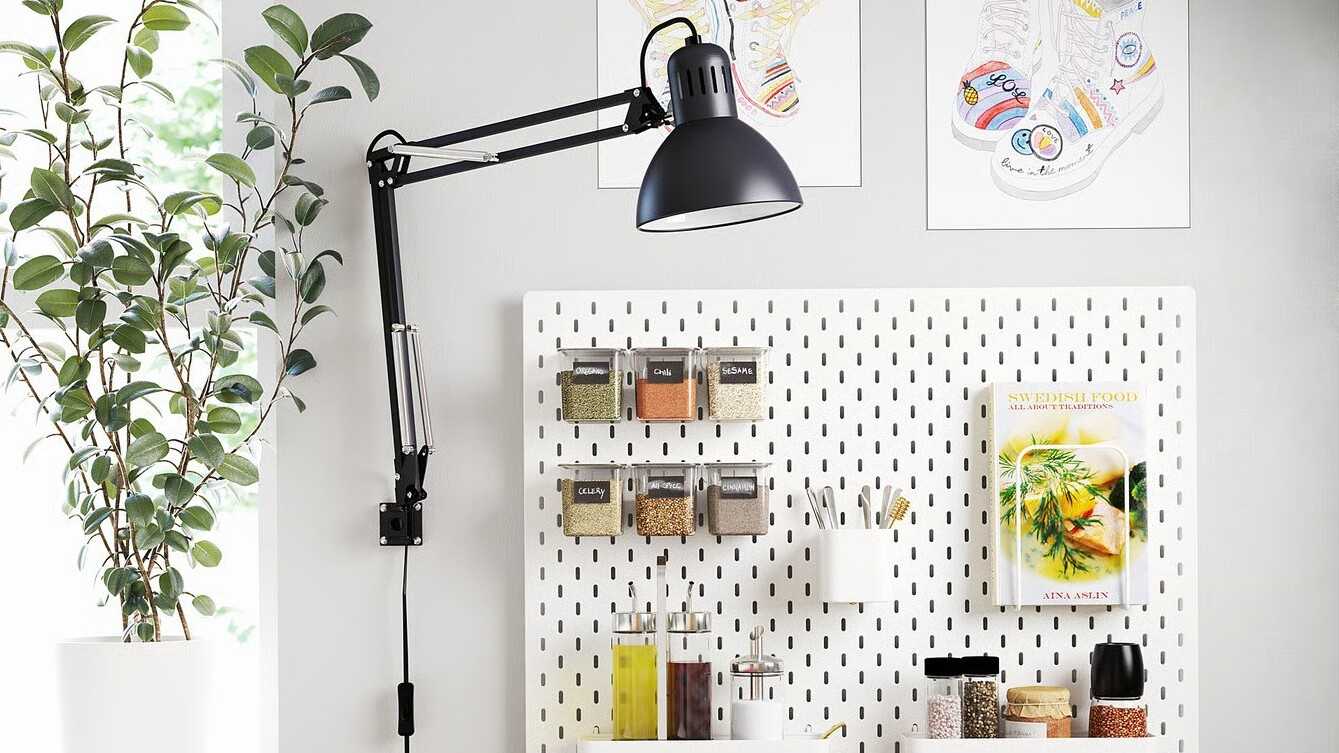
IKEA's product lineupfeatures several long-standing designs, such as theThird work lampintroduced in 1998.I picked one in a matte gray finish a few years ago to complete my desk setup. It's a simple, articulated arm lamp that does its job well, but it comes with a catch: it doesn't include a freestanding base. Your only options out of the box are either to screw a small mount directly into your wall or use the included C-clamp to attach it to the edge of your desk. Besides the L-shaped flange and nut threaded on it for clamping, all the parts are polymer or plastic.

I opted for the desk clamp because of its impermanence, and for the first couple of years, it was okay. There was a fair amount of wobble when I wrote on the desk, but it provided excellent task lighting for late-night work and hobbies. Gradually, this wobble worsened into a constant, irritating jiggle every time I bumped my desk. A quick investigation revealed that the plastic C-clamp base was cracking under constant stress. The very part responsible for holding the entire metal lamp steady was failing. I wasn't worried yet since IKEA emphasizes design, and I assumed they would supply a replacement clamp from their stockpile to address this known issue.

The customer support response was frustrating and predictable - the clamp isn't sold or supplied separately, and the official recommendation was to buy a new lamp. The thought of discarding my perfectly good one and contributing to a landfill over one little plastic bit left a sour taste in my mouth. I decided that if IKEA didn't solve my problem, I'd solve it myself with CAD and 3D printing.

Attempt one: A flawed replica

I should have known better

Since my original ternary clamp had cracked, but was still in one piece, I measured it with Vernier calipers and replicated it in CAD software, just stewing over the wastefulness. The reverse-engineered clamp was ready to print within the hour, and the result was cathartic. I was taking back control from a company that just wanted me to be a repeat consumer, and 3D printing helped replace a broken part without spending a dime. However, my triumph was short-lived.

As I used the lamp over the next few days, I realized my fundamental mistake: I had faithfully replicated a flawed design. In addition to the weakness induced by the3D printed infill pattern, this part was just as susceptible to the same stresses that broke the original solid plastic piece. This was merely a temporary solution.

Attempt two: Upcycling with a vengeance

Numerous improvements

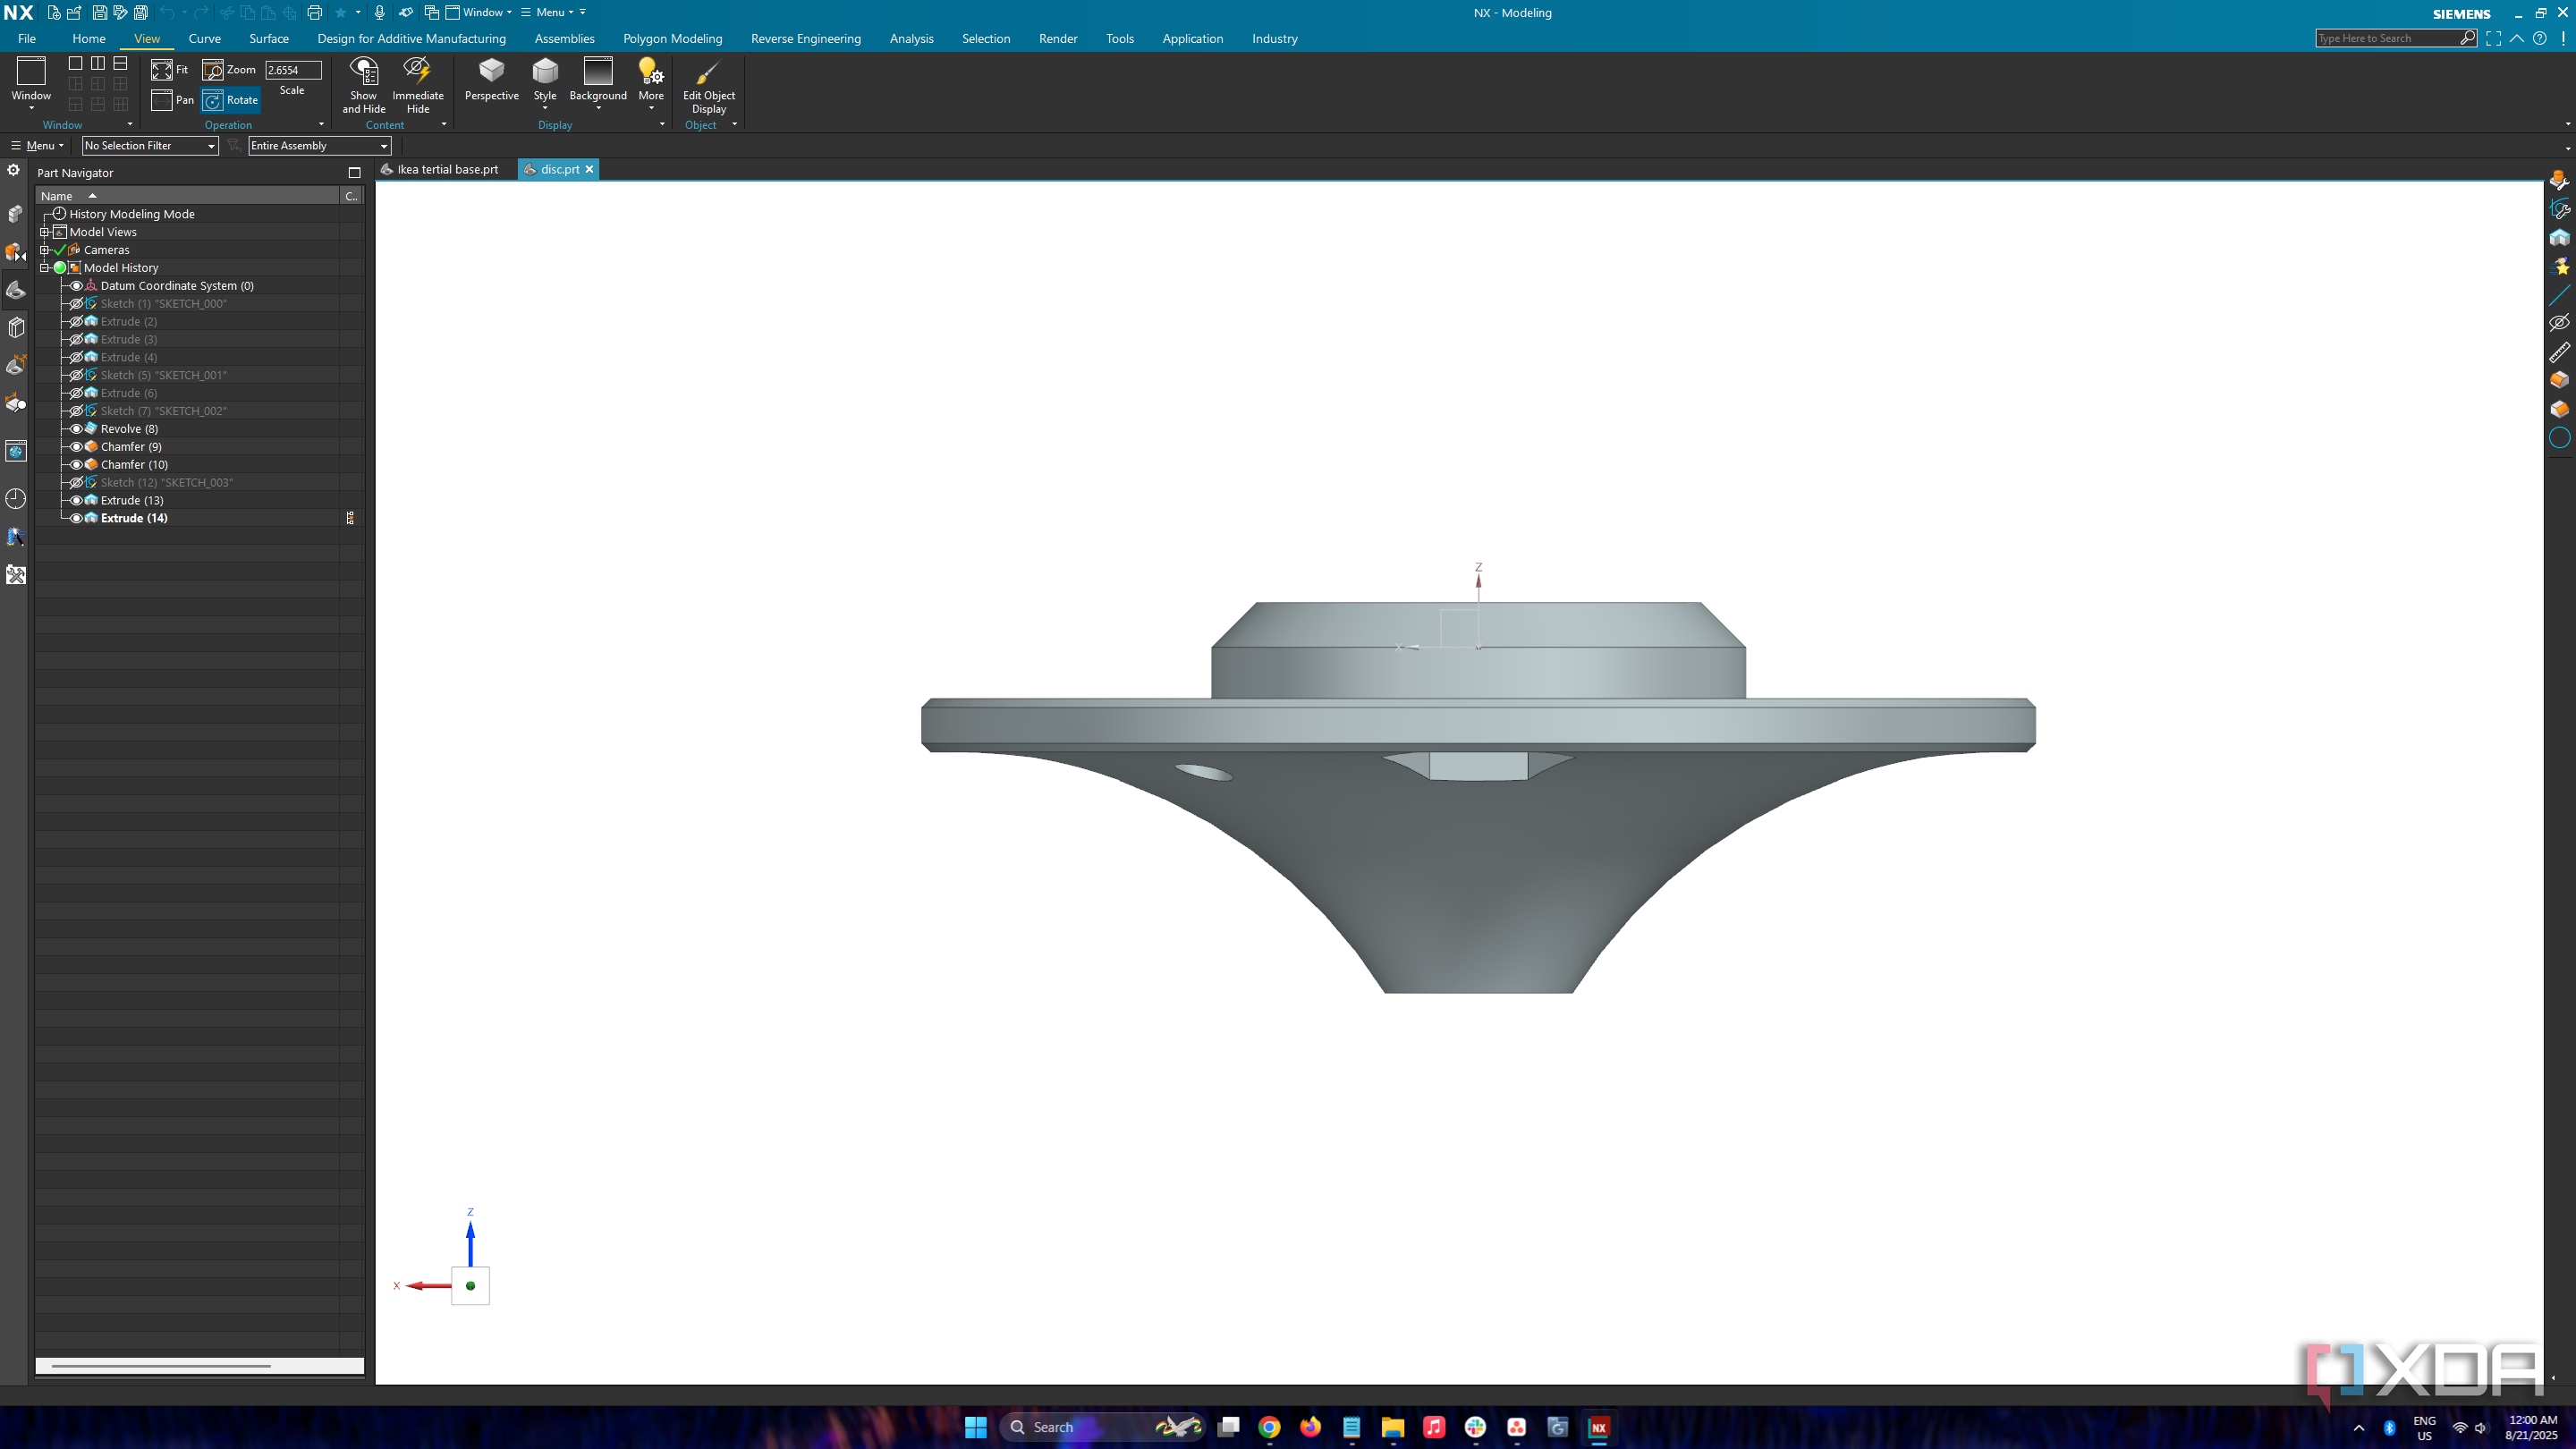
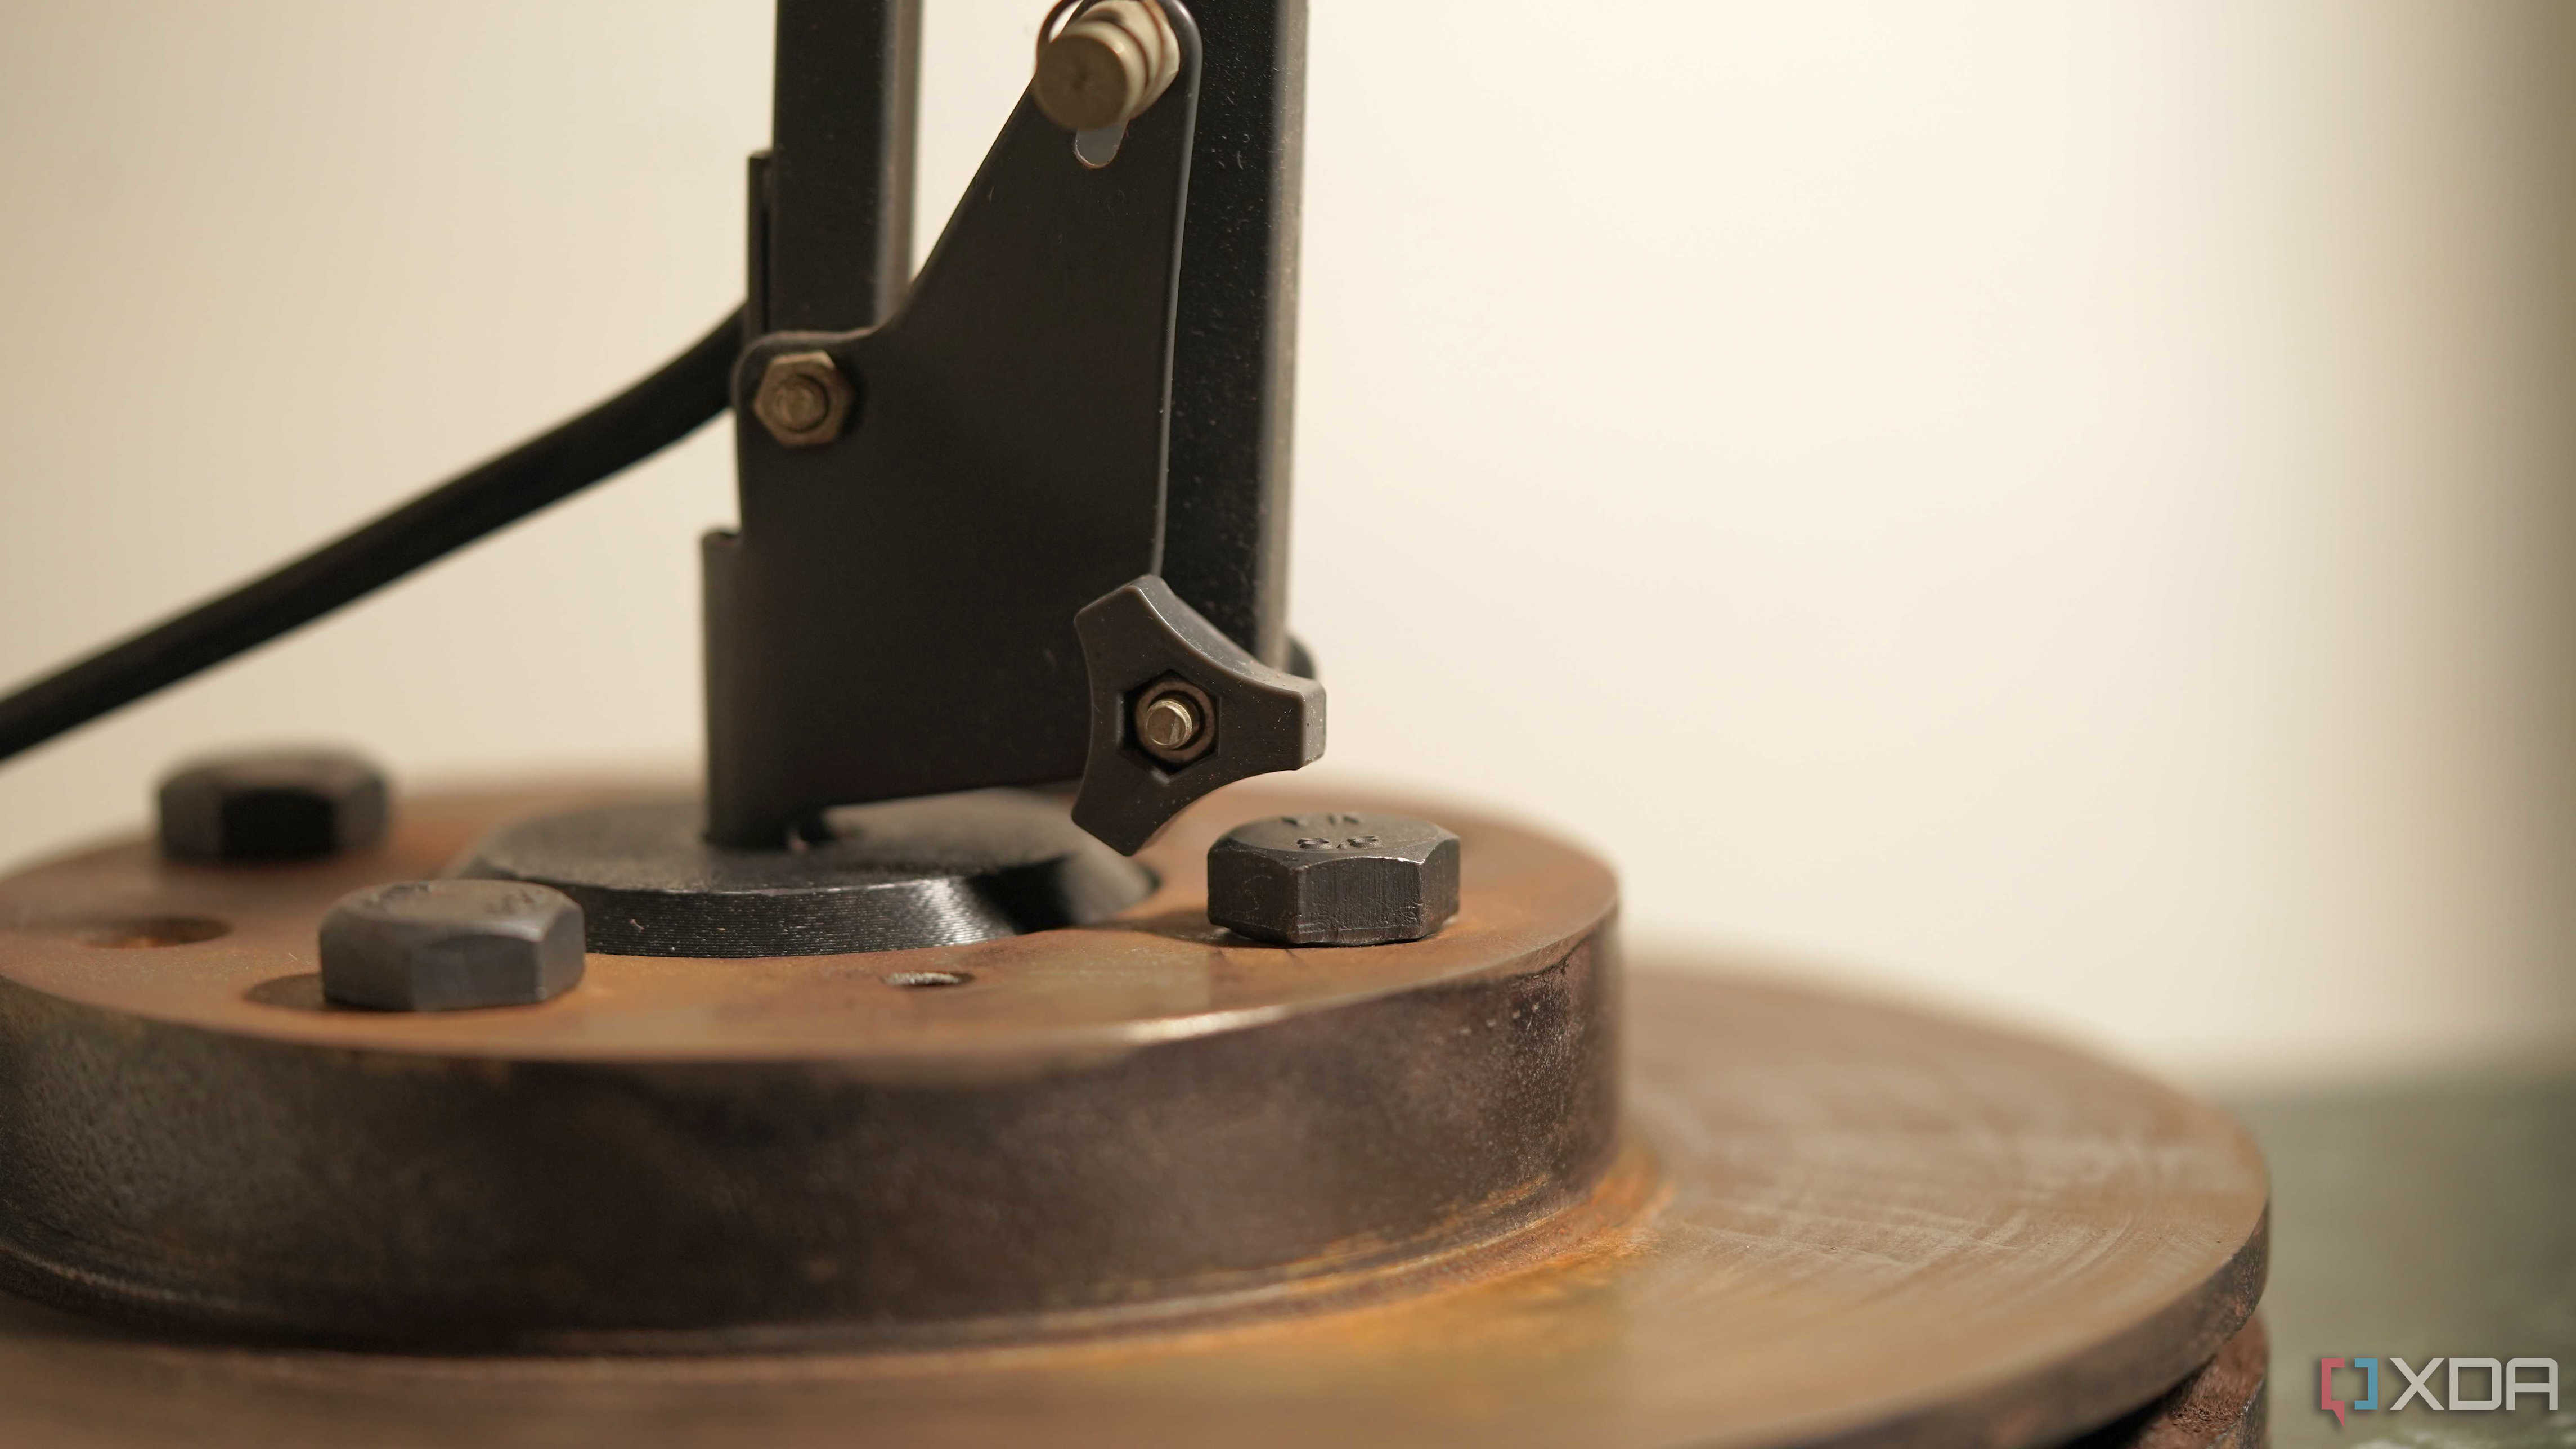
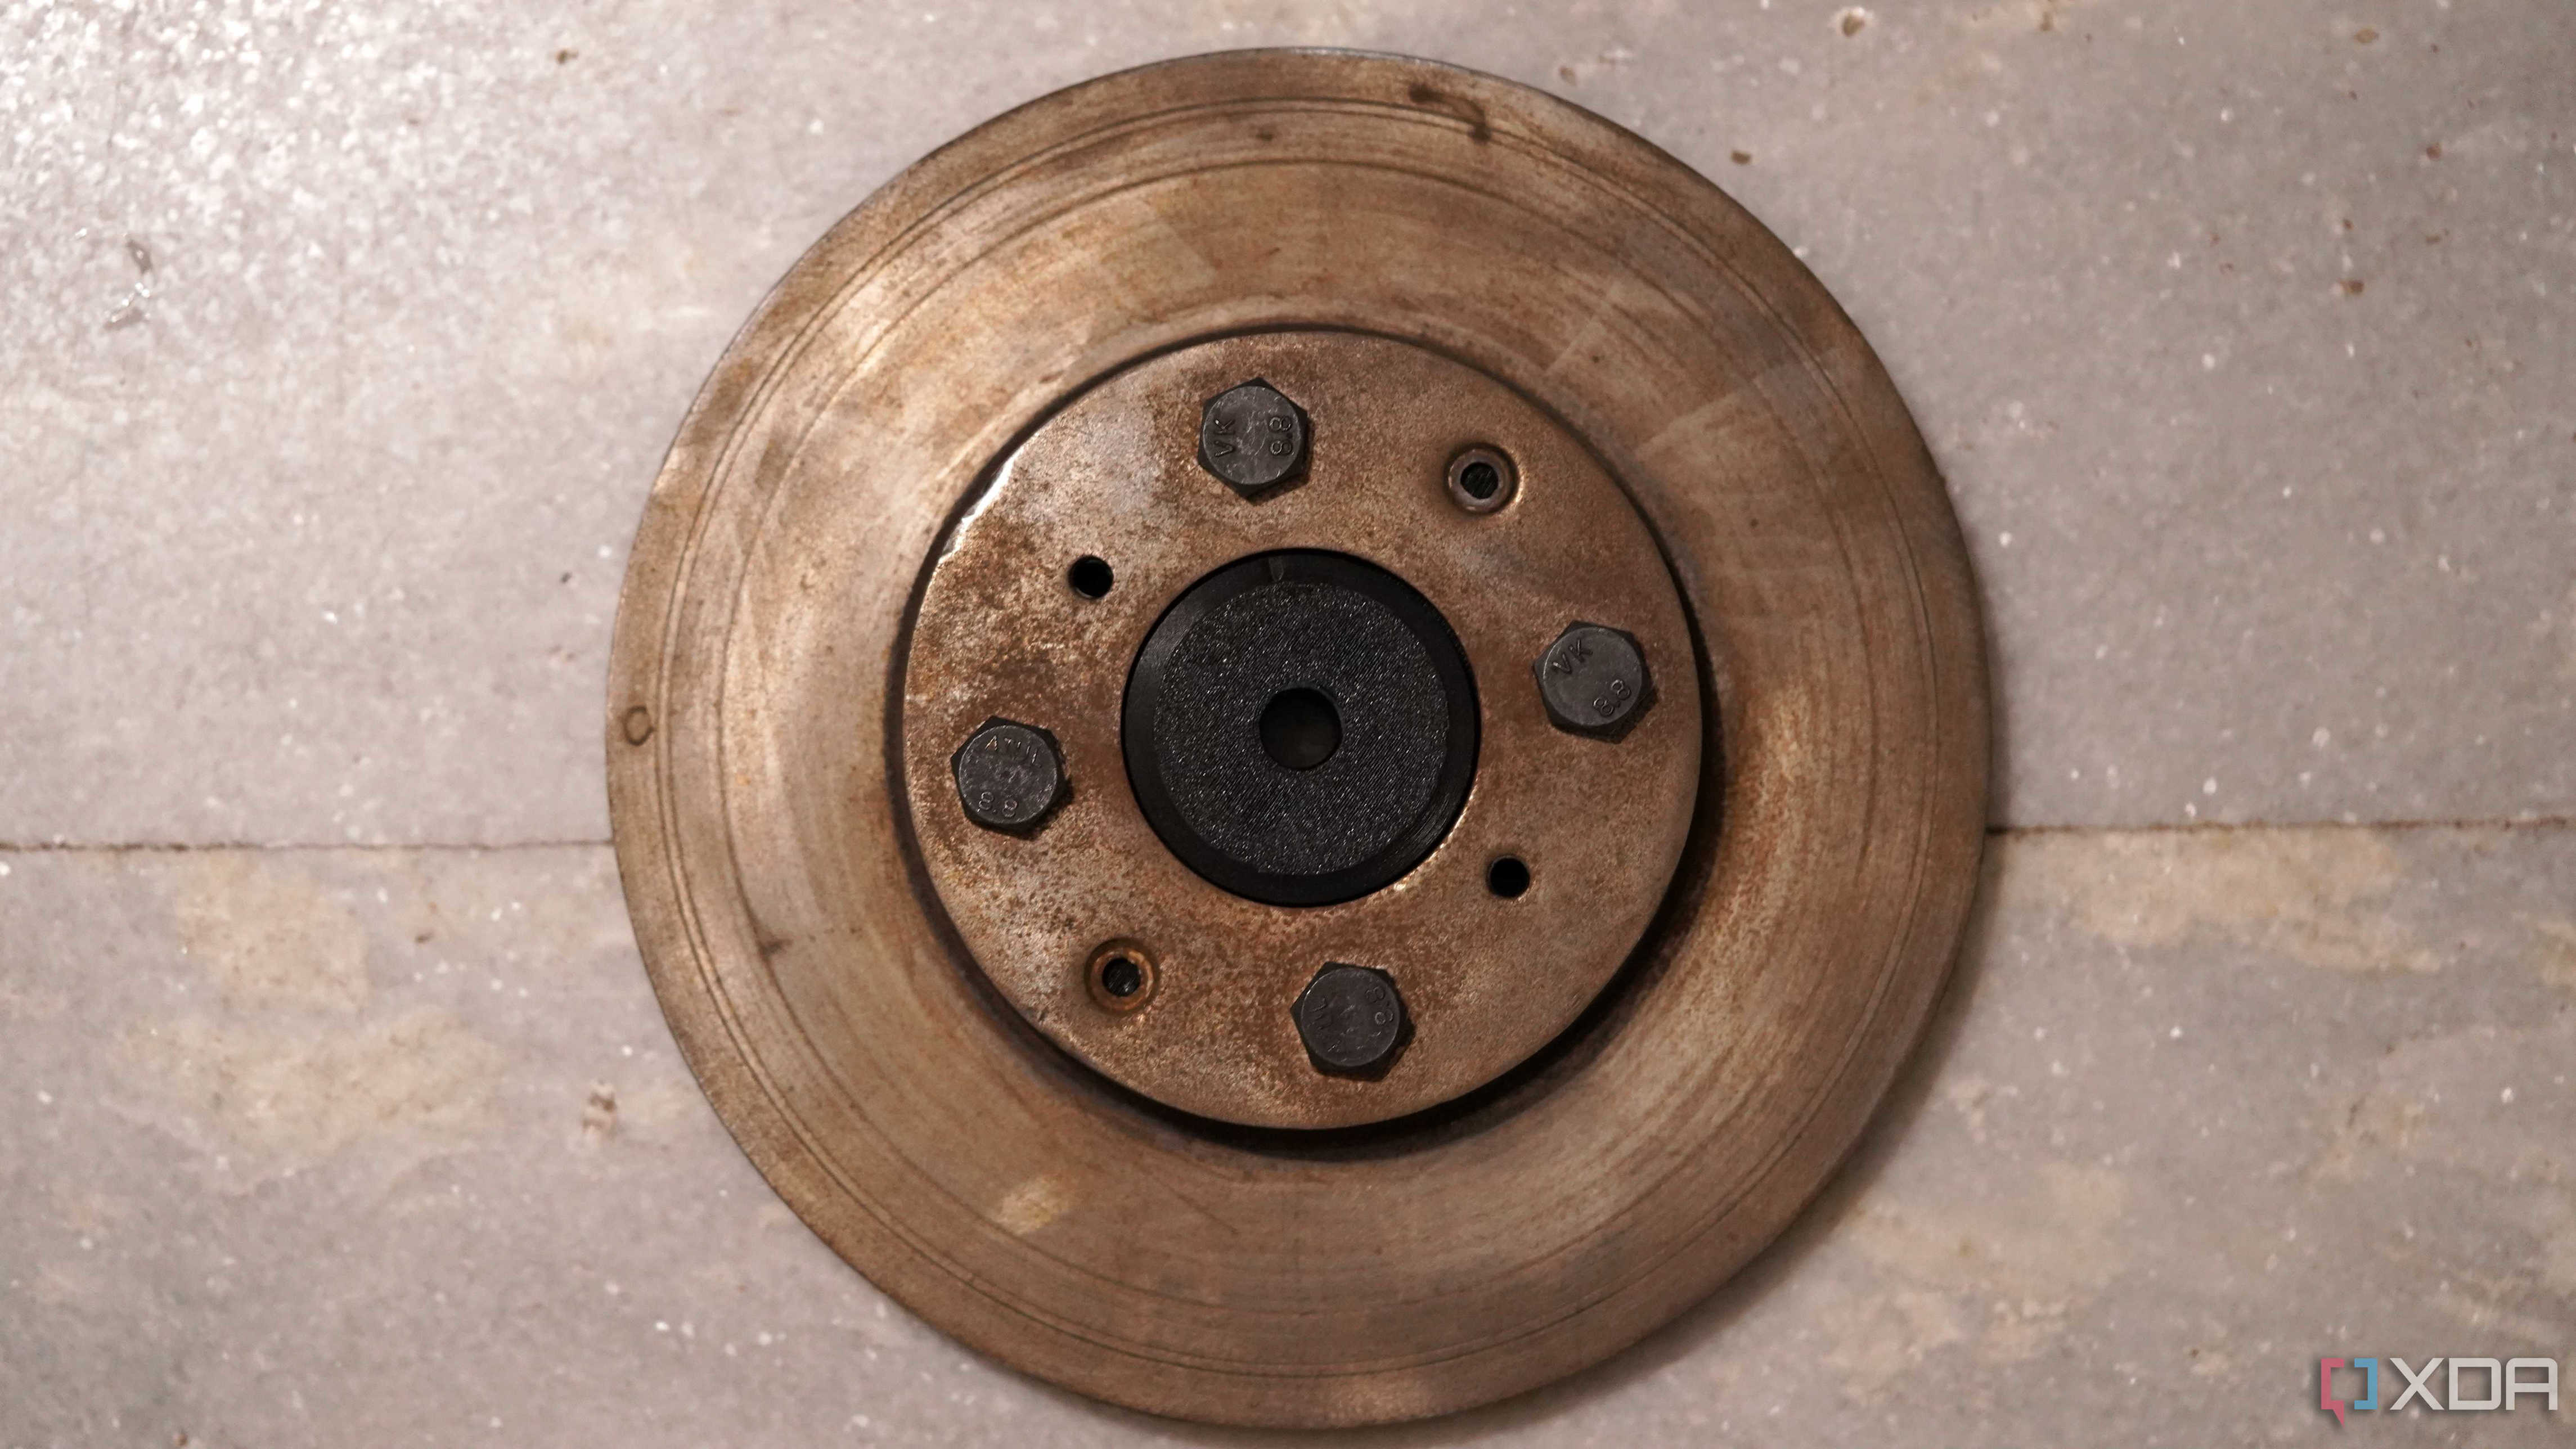
I needed a proper, heavy, freestanding base for the lamp to replace the clamp. It would take up more room on the desk, but a larger footprint would guarantee stability as well. Right on time, my car's brake rotors were replaced, and I could either scrap the large cast iron disks, or upcycle at least one into a tertiary base while I turned the other into a cool desk clock. The rotor's design was perfectly suitable as well. It had a perfectly flat base and a large central hole for the wheel hub. For my application, I needed to design and 3D print an adapter that tightens the central hole for the tertiary's slim shaft. The bottom of the adapter flared out into a wide, flat disc with four holes that aligned with the lug nut holes on the brake rotor.

This time I didn't need the plastic heft, so I printed at just 20% infill, and threw in four short bolts. The nuts are held captive by design in the plastic part, so you can tighten them from the top without lifting the heavy rotor. The 3D-printed adapter dropped into place perfectly. I inserted the lamp stem and then used four bolts to fasten the adapter securely. The result was tight tolerances and a friction fit with the tertial shaft that allowed zero wobble.

Practical solutions take the cake

This new setup has been in service for more than a year now, and flawlessly so. The utilitarian cast iron is a fantastic conversation starter, but my favorite part is how the print isn't permanent. If I ever replace the lamp, I can simply unbolt the adapter and repurpose the brake rotor for another project. This simple fix was only possible because of the accessibility of 3D printing. It allowed me to bridge the gap between two completely unrelated objects, creating a functional and aesthetically pleasing solution to a real-world problem. This hobby runs deeper than Thingiverse and Printables if you dare push back against the throwaway culture we're so accustomed to.

All it takes is a little design skill, digital calipers, a practical problem you're facing, and the imagination to solve it all. There's so muchyou'll never buy again once you get to 3D printinginstead.